Updating and Flashing the the Toolhead MCU
By Einlander
The Qidi 3 series toolhead is based on the Makerbase THR36 and THR42 toolheads (https://github.com/makerbase-mks/MKS-THR36-THR42-UTC). Flashing the qidi toolhead is a similar experience. They both use a Raspberry Pi 2040 MCU and can/are controlled by USB. The major difference is the Qidi toolhead runs 24v over the USB lines. The Qidi printers run a version of Armbian Linux running Debian Buster.
The Process.
Here, we will break down the main steps to update and flash toolhead:
-
Compile the Klipper firmware.
-
Set the toolhead to DFU mode
-
Upload the firmware
Assumptions and Prerequisites
Wherever possible, we will proceed using the easiest method. Tough updating and flashing the toolhead can be done completely in Linux, we will assume that a Windows PC will be used. Software that will be used is any SSH client (I think Windows 10 has one built-in). I will assume that you know how to acquire, setup and use ssh.
MAKE SURE TO REMOVE ALL USB DRIVES AND MEMORY CARDS!
They may conflict or make this guide difficult to follow or complete.
Compiling Klipper firmware:
Connect to printer
First we need to log into the printer using ssh as the user mks. You connect by directly connecting to your printer by using it's IP address.
The address format is :
mks@your.ip.address.hereThe default password is
makerbase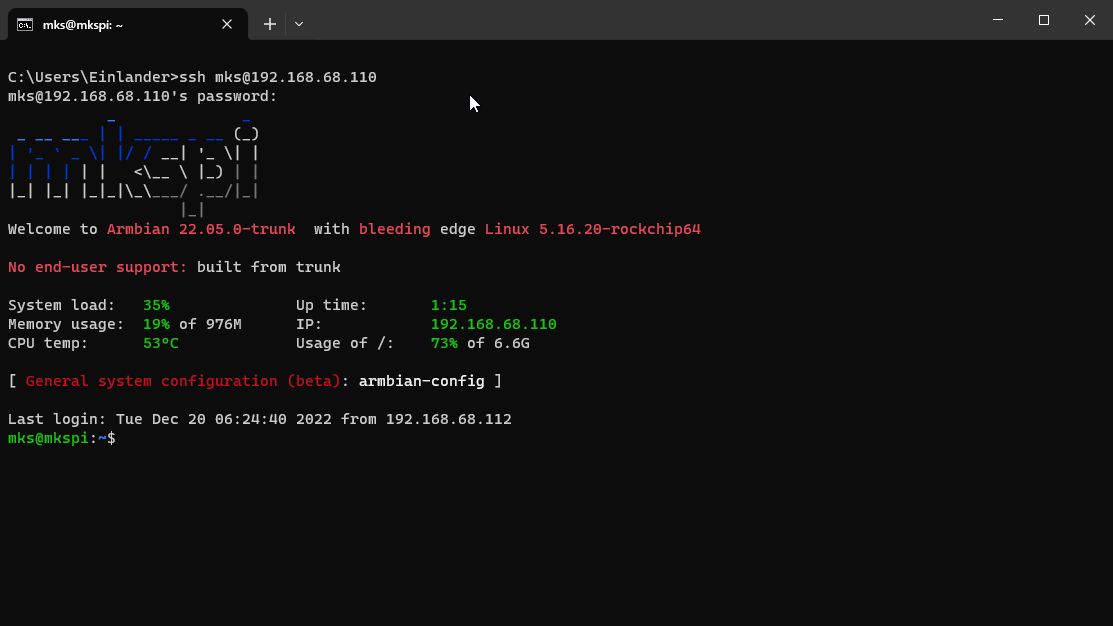
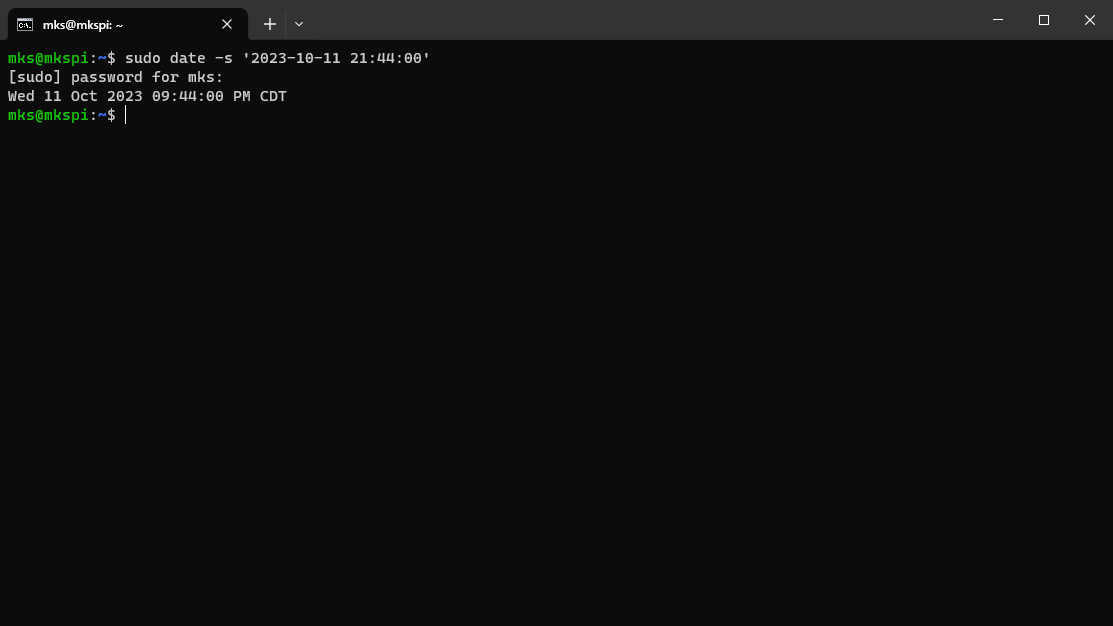
Set the time
Before we do anything else, we need to set the time.
Failing to do this step may cause the update process to fail or become more difficult.
The command to set the date is
sudo date -s 'YYYY-MM-DD HH:MM:SS'the password is: makerbase
You can also try this command to try to set it automatically.
sudo date -s "$(wget -qSO- --max-redirect=0 google.com 2>&1 | grep Date: | cut -d' ' -f5-8)Z"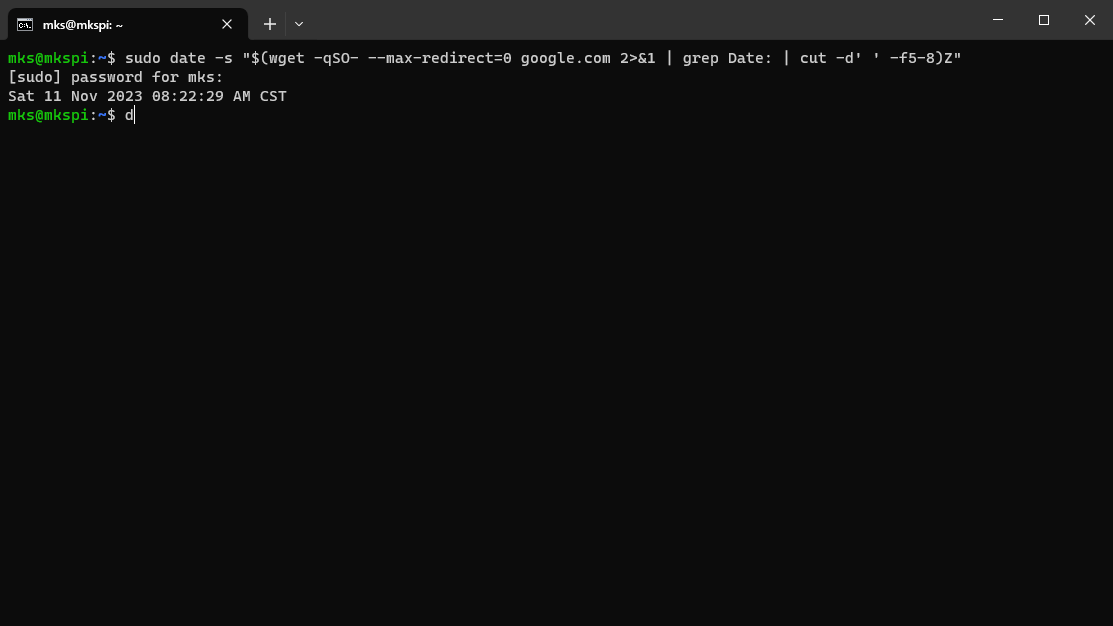
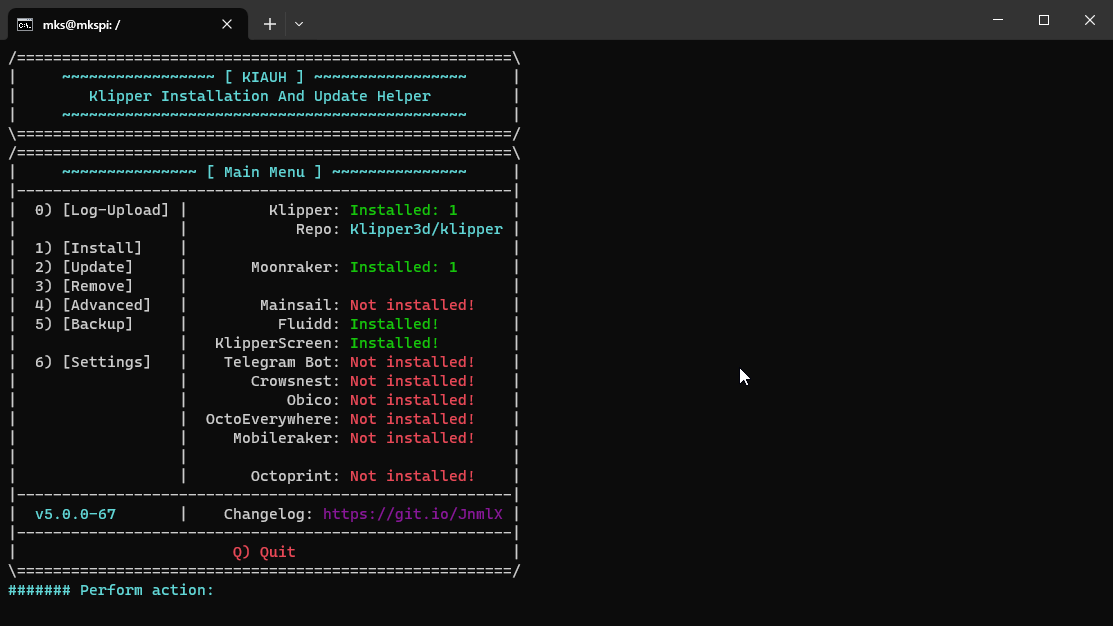
Kiauh
Now, we are at one of the main parts of updating and flashing the toolhead. For this, we will use KIAUH the Klipper Installer and Update Helper. In our case, it is already installed on the printer. To run it, we must first type this command:
~/kiauh/kiauh.shThis command will only work when logged in as mks. It will warn you if you use it as root.
KIAUH will ask you if you want to update, type:
Y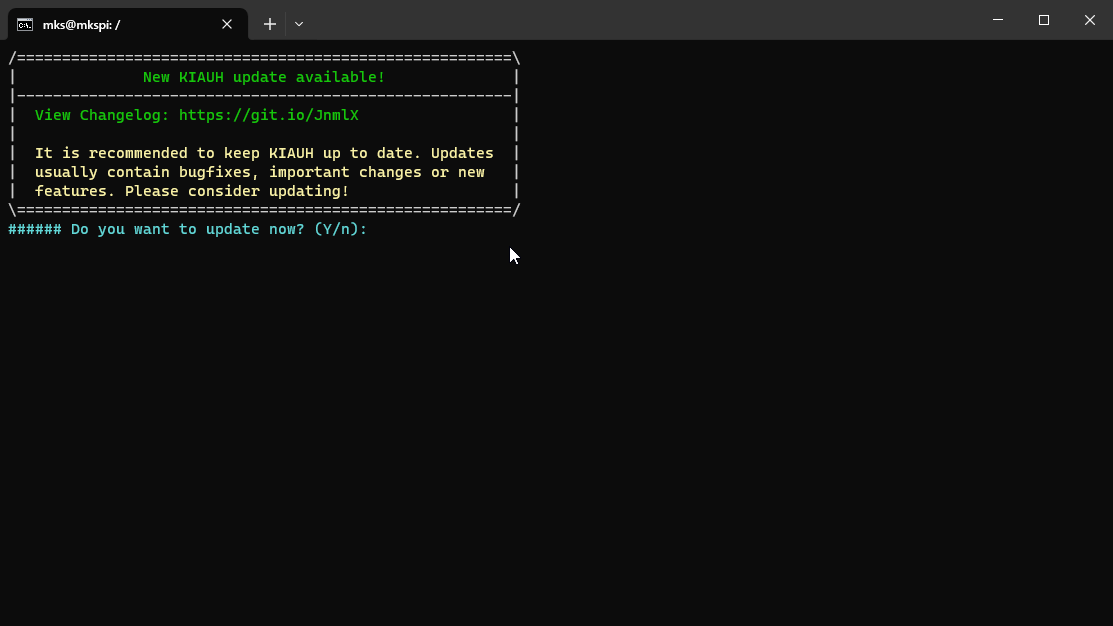
After it updates, we need to delete some folders.
This assumes you have never gone through this tutorial before. Qidi has customized some of the files, and KIAUH will fail when it finds them. You shouldn't need to do this in future updates. For our purposes, we will delete the directories.
sudo rm -r ~/klipper/
sudo rm -r ~/moonraker/
Start KIAUH again by typing:
~/kiauh/kiauh.shYou should have arrived at the Main Menu screen:
First, we type 3 to get the Remove Menu.
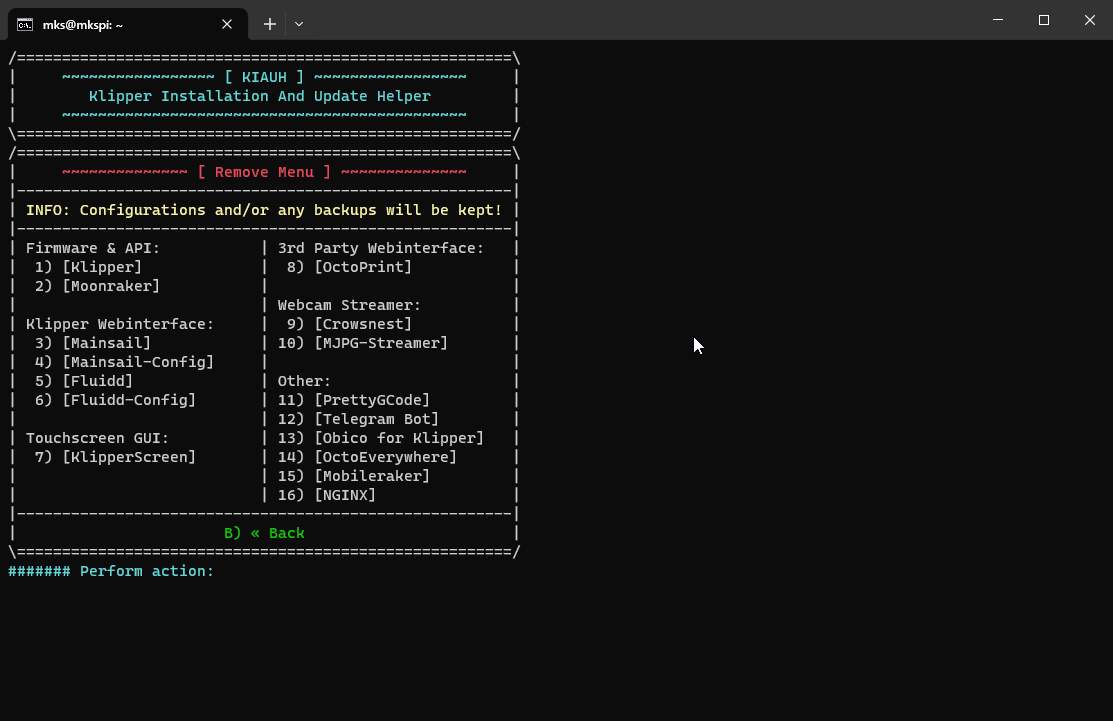
Then we remove 1 Klipper , 2 Moonraker, and 3 Fluidd.
When it returns to the Remove Menu, we will Type B to return to the main menu.
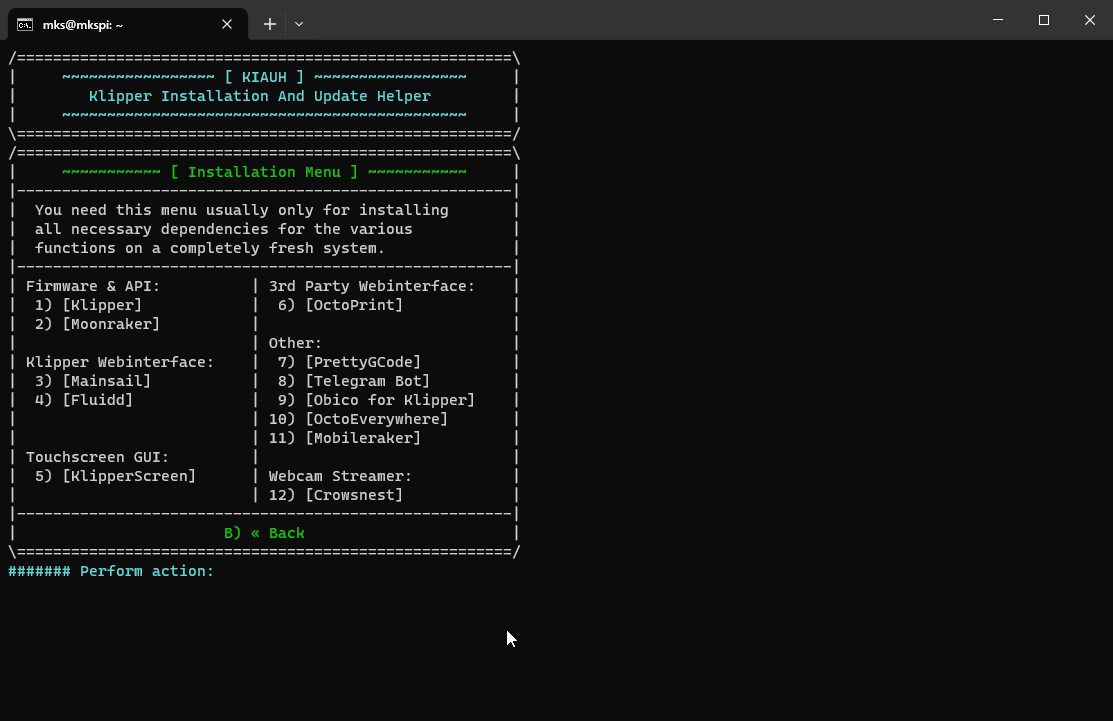
Type 1 for the installation menu
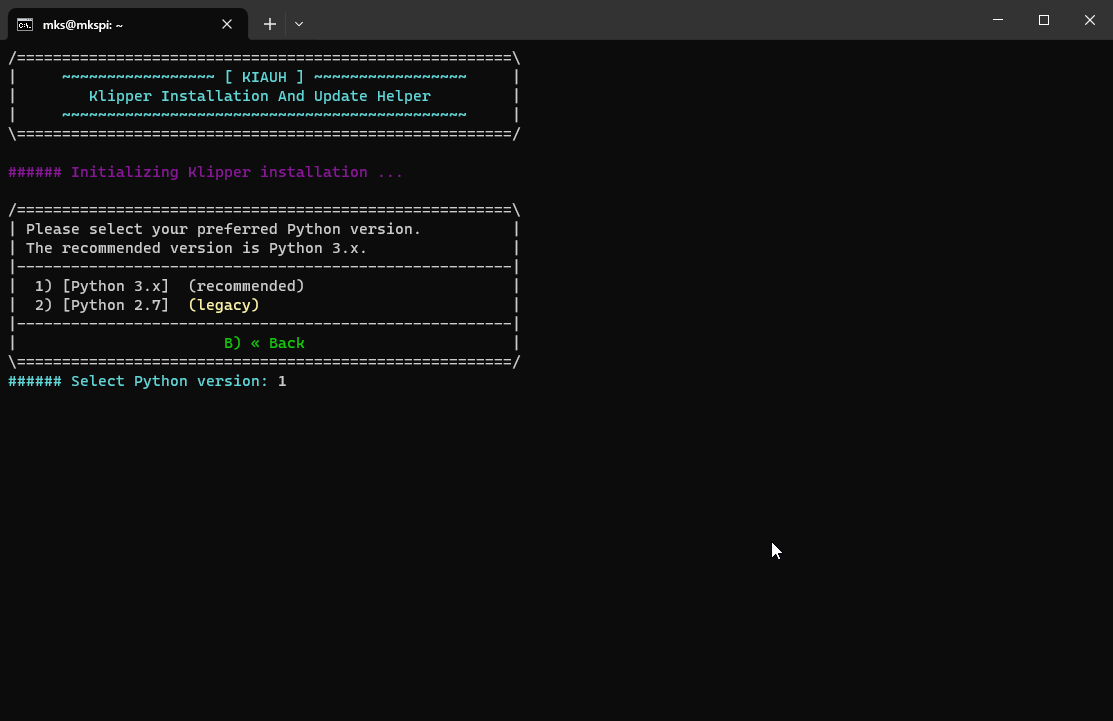
Type 1 to install Klipper.
Type 1 to use Python 3.x
Type 1 to run one instance of Klipper
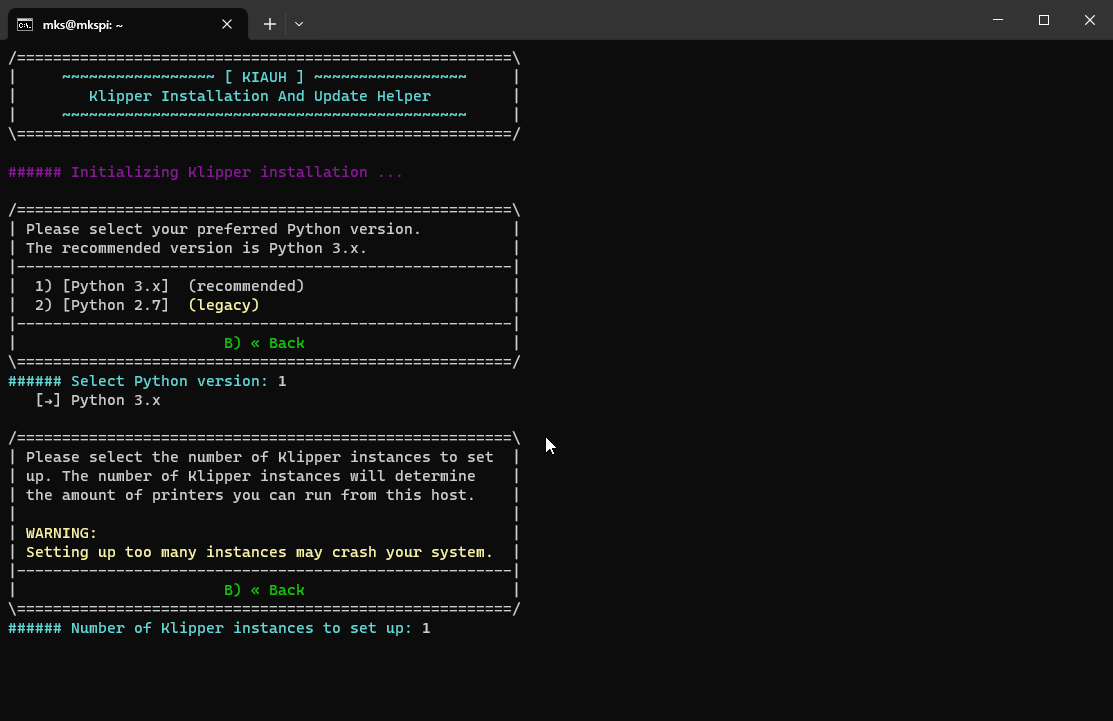
Wait for it to install.
When KIAUH returns to the Installation menu, Type 2 to install Moonraker and wait for the install. Then install 4 Fluidd, answering yes to the questions it asks.
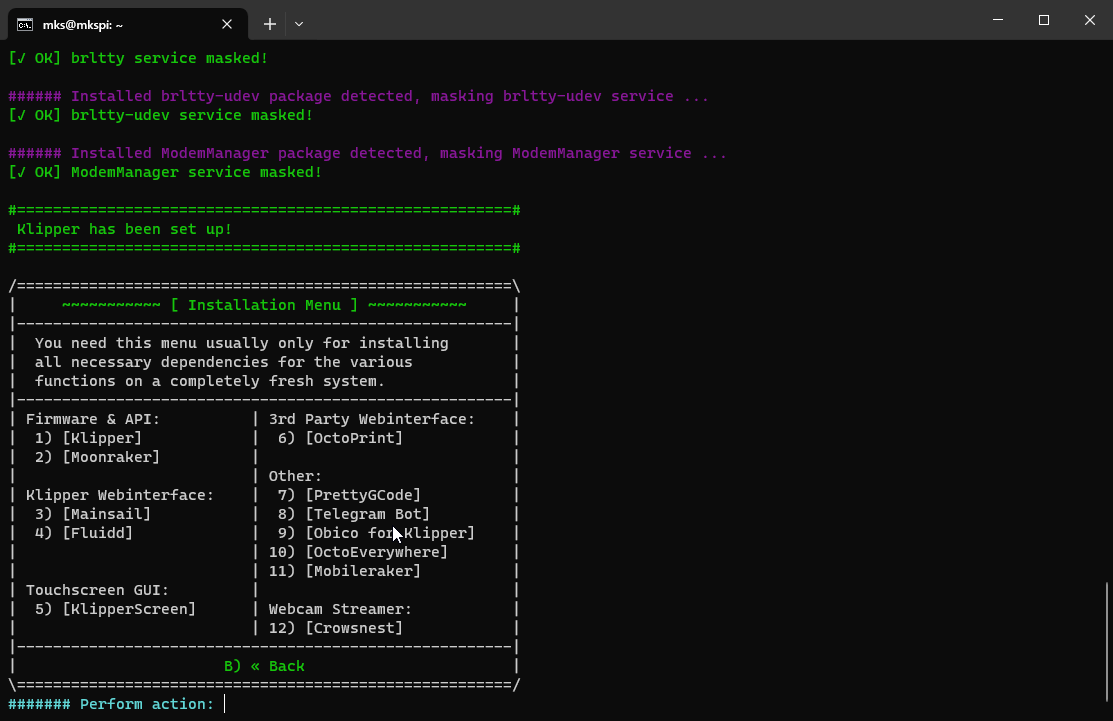
Type B to return to the main menu and 2 to go to the Upgrade Menu.
Type 4 to upgrade Fluidd, then return to the main menu.
Type 4 to go to the Advanced Menu.
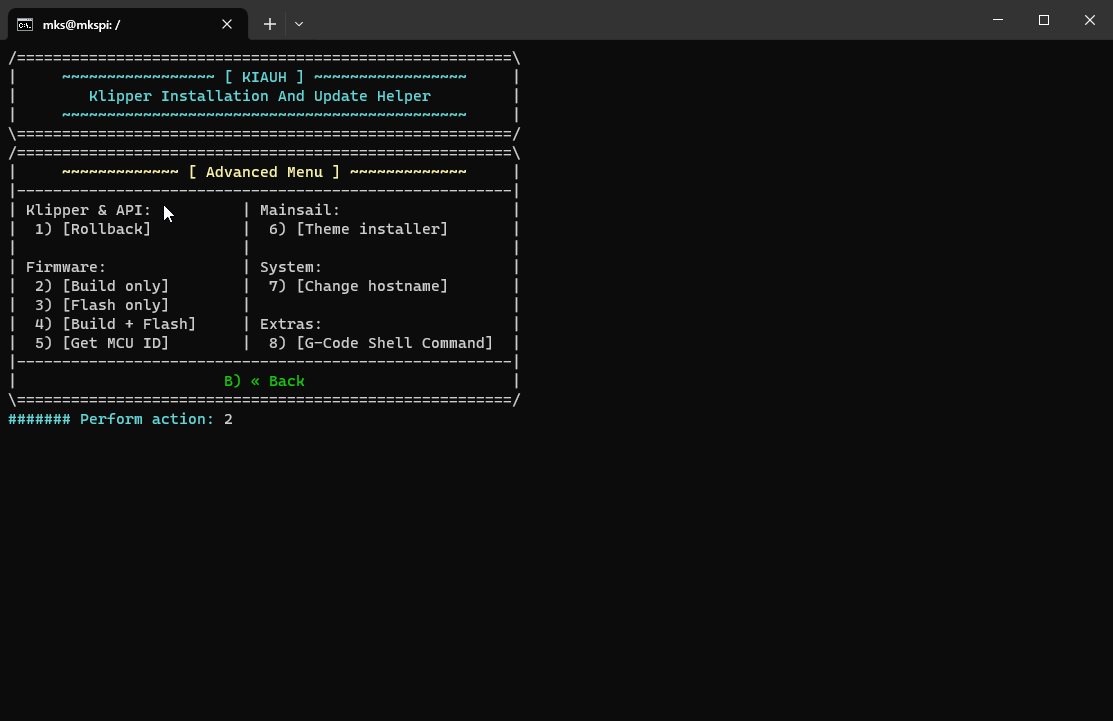
MCU Settings
The next screen you will see is the Klipper Firmware Configuration screen. Here, we will need to change the settings to match our toolhead mcu. Press space or enter to select items.
Select: Enable extra low-level configuration options
Select: Micro-controller Architecture (Raspberry Pi RP2040)
Then, leave everything else alone.
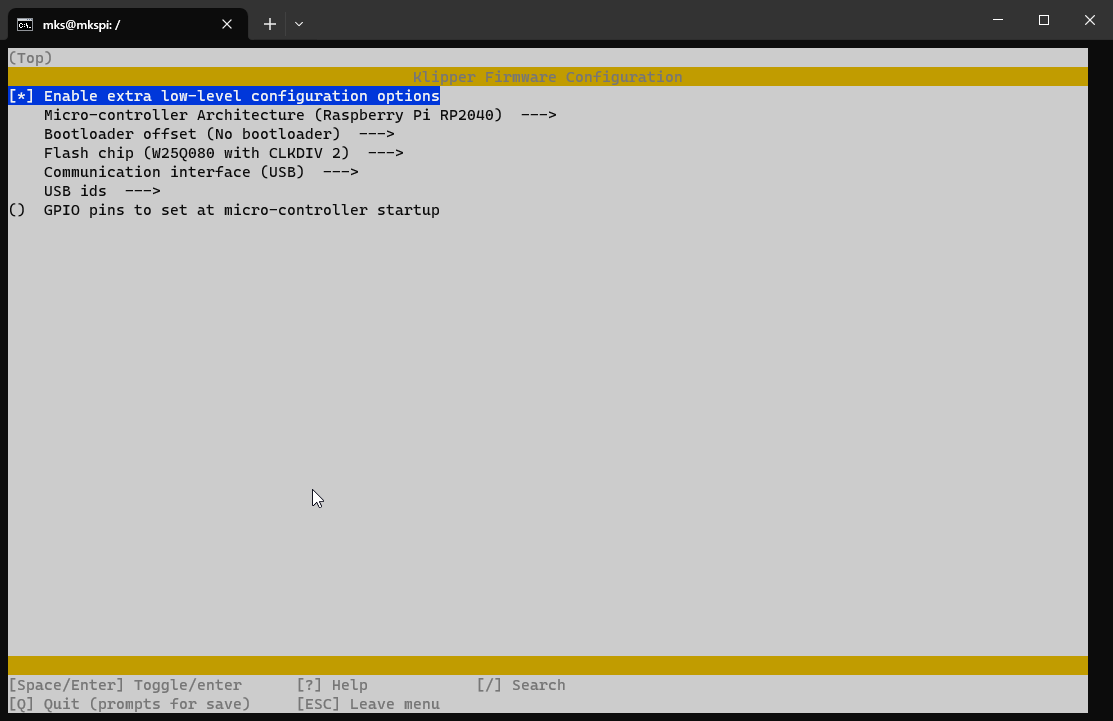
Press Q, then Y to save. The firmware will be built, and it will return us to the Advanced Menu.
Now, we want to quit KIAHU. Press B to return to the Main Menu and Q to quit.
Setting the toolhead to DFU mode
Setting the toolhead to DFU mode requires you to remove the back cover of the toolhead.
On the bottom left, there are two buttons labeled BOOT and RESET.
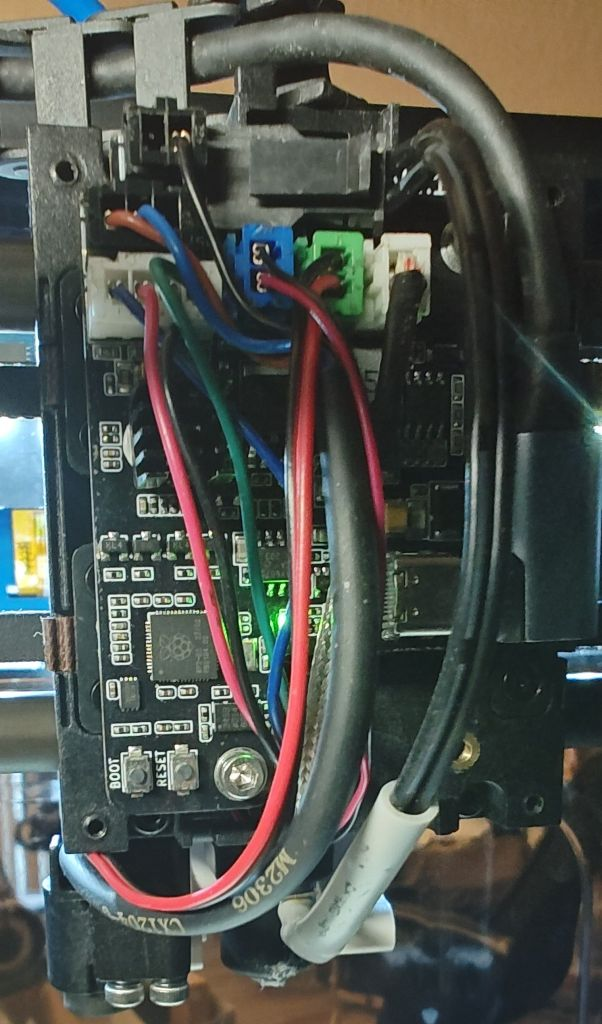
The easiest way to put it into DFU mode is to press and hold the BOOT button, press and release the RESET button, and then release the BOOT button.
You have to press the reset button while still holding the boot button.
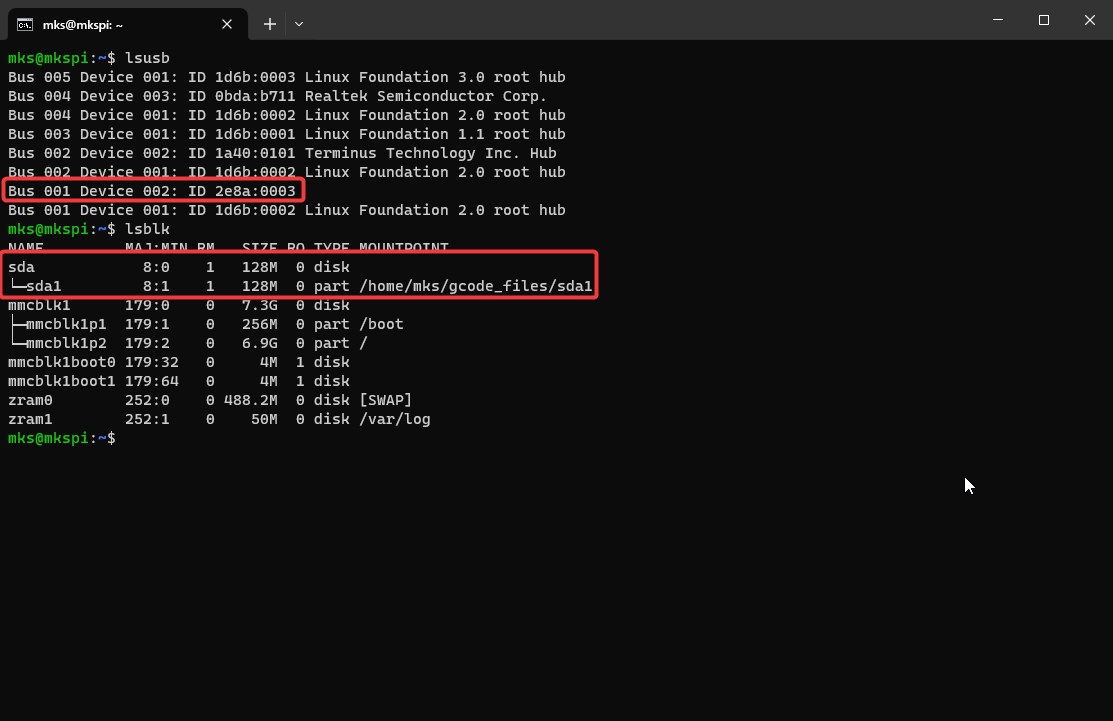
To check if your toolhead is in DFU mode, type:
lsusb
lsblk
If you see an OpenMoko, Inc. device, it is not in DFU mode.
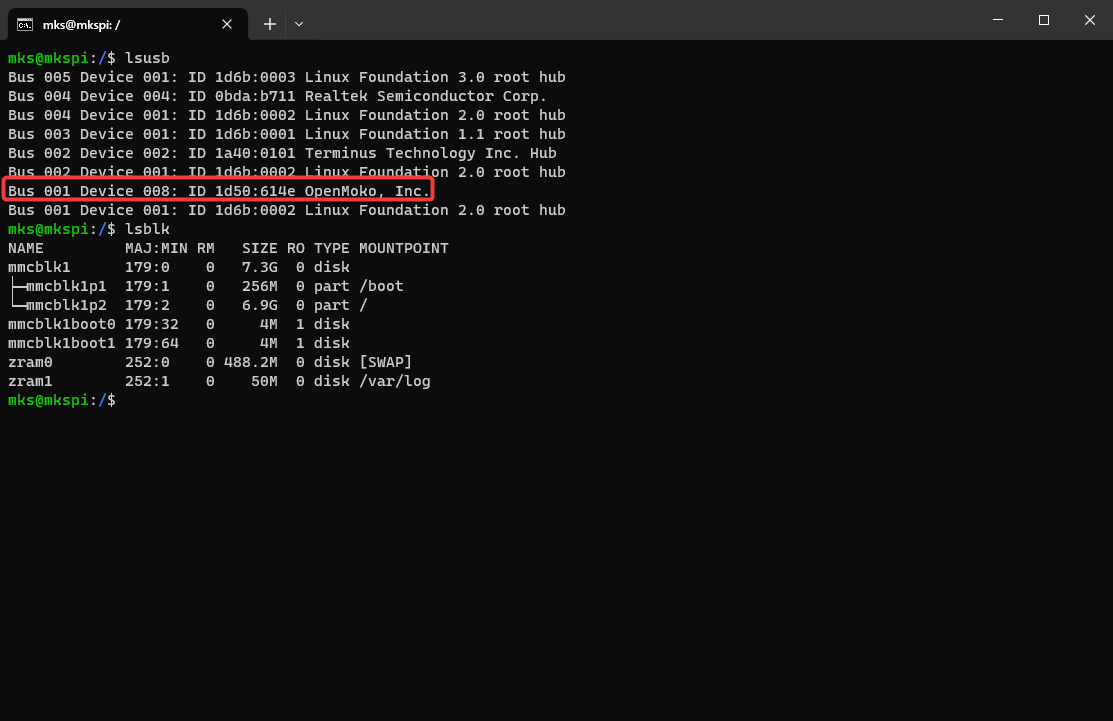
If you do not see an OpenMoko, Inc. device AND a sda disk with a MOUNTPOINT of /home/mks/gcode_files/sda1 the toolhead is in DFU mode.
The disk name may also be named sda, sdb, sdc, etc.
Uploading the Firmware
Now that the toolhead is in DFU mode, it will show up as a USB drive to the printer. Luckily QIDI decided to auto-mount USB drives for us.
To upload the firmware, we simply need to copy the compiled Klipper firmware file to the toolhead.
To do that type:
cp ~/klipper/out/klipper.uf2 ~/gcode_files/sda1/As soon as the file is copied, the toolhead will no longer be in DFU mode and it will disconnect the drive.
Finishing Up
Completing Moonraker Update
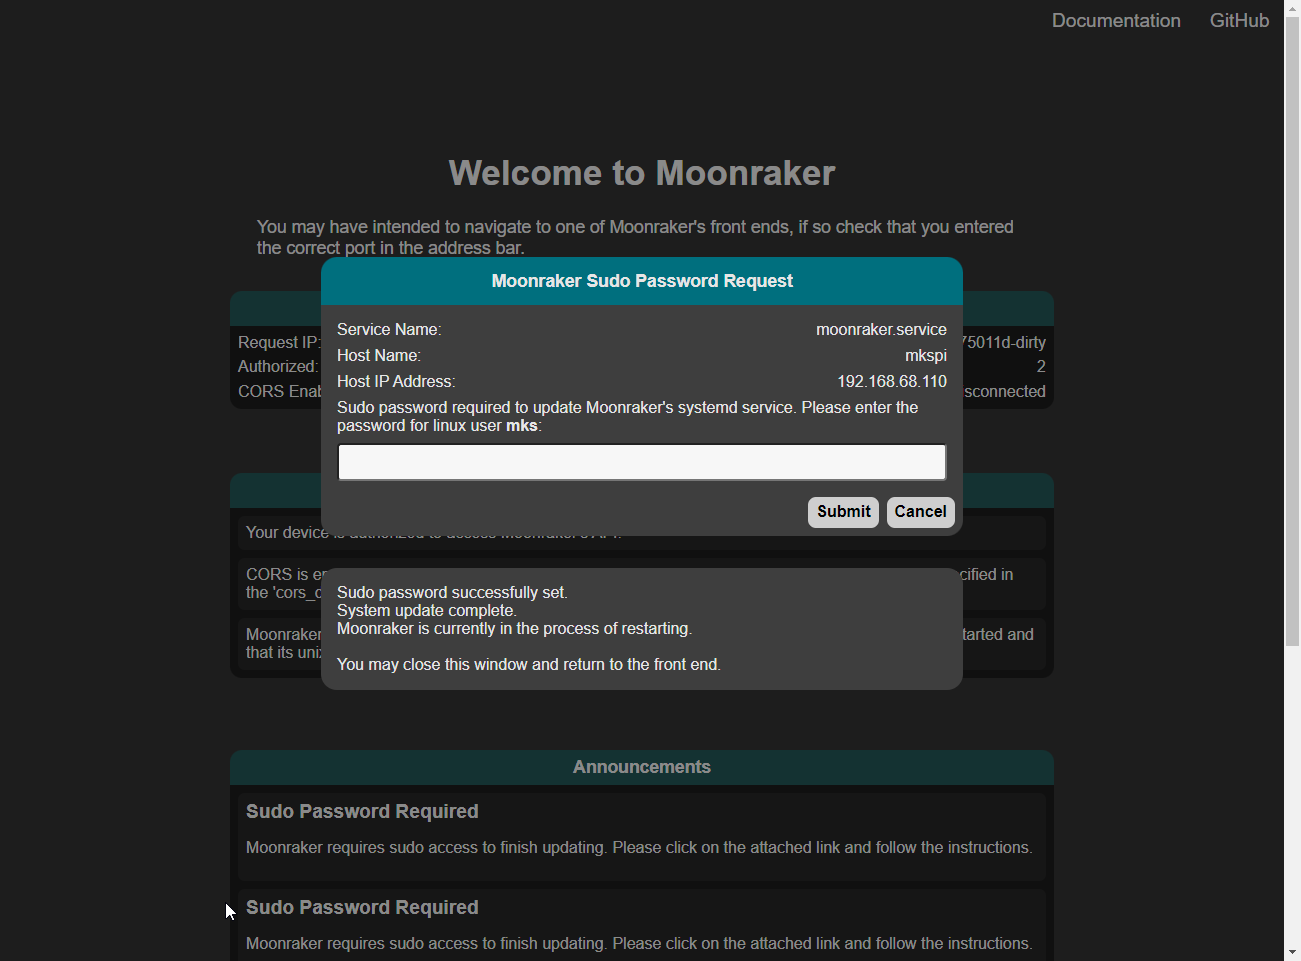
Turn the printer off and on. Then, connect to the web interface. In the console, you may see Moonraker prompting you to go to a specific IP address to complete the update.
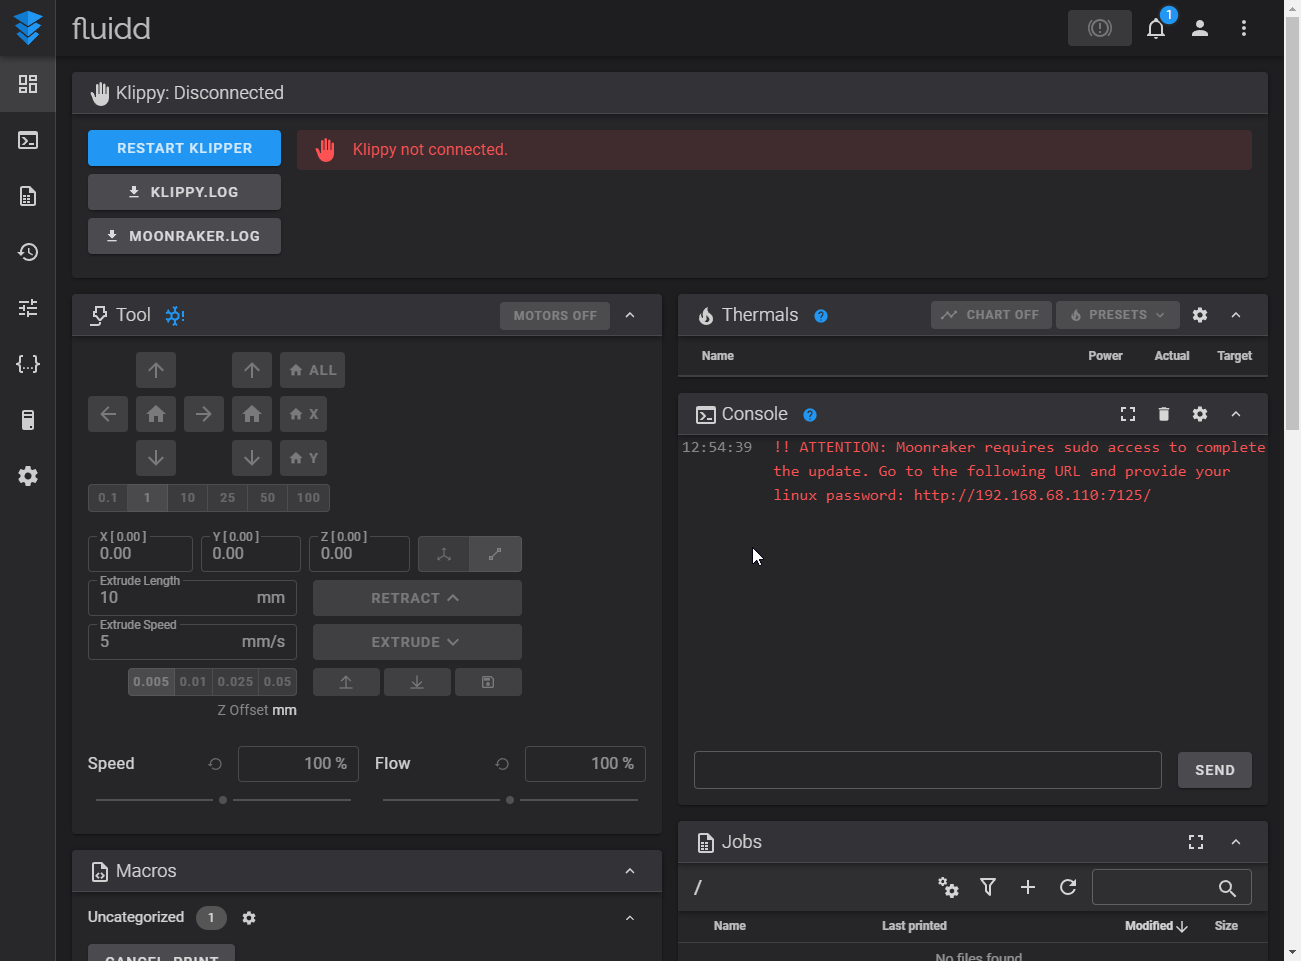
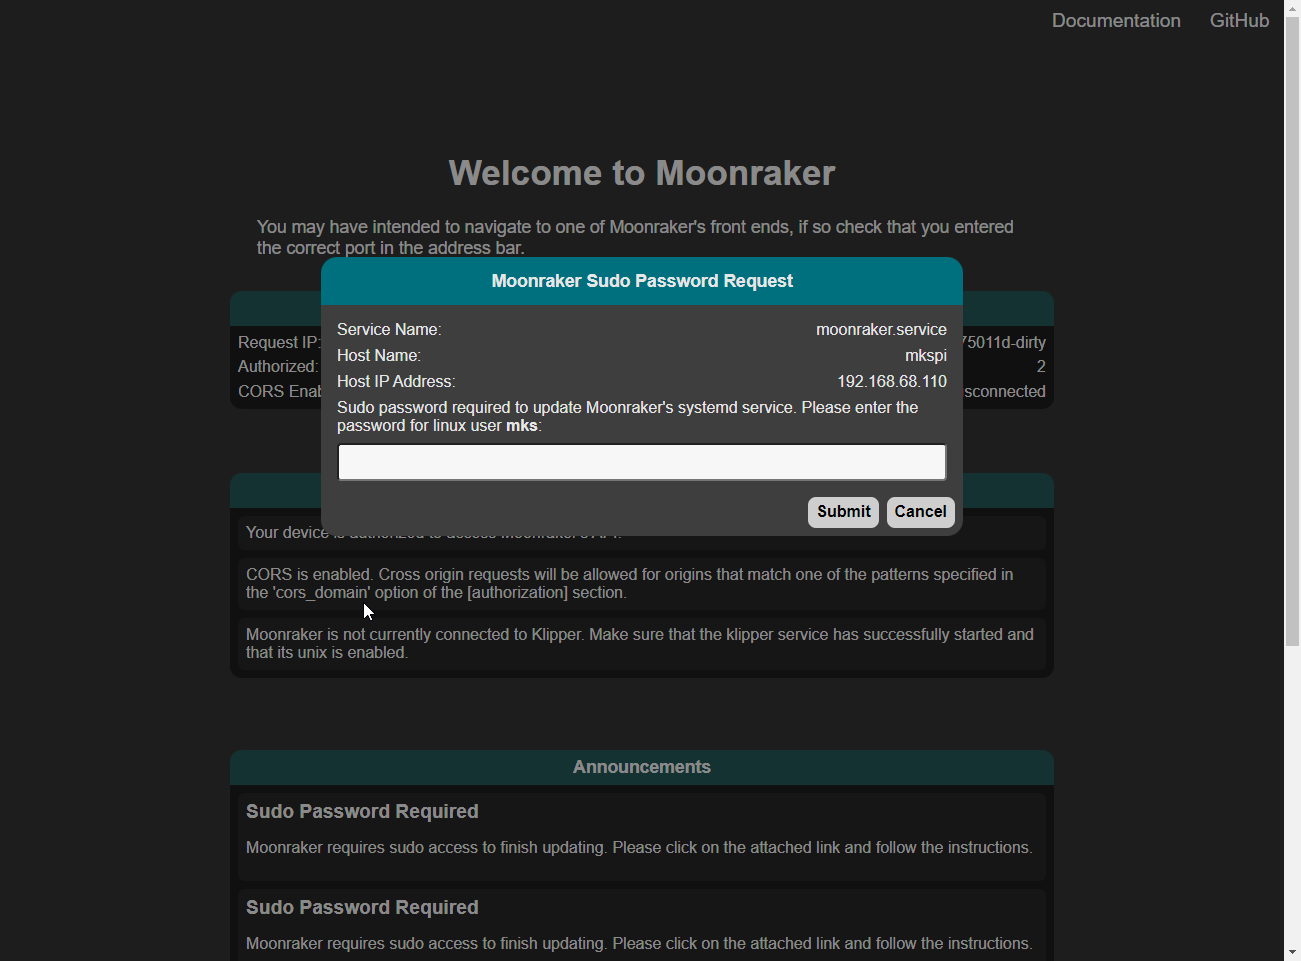
Type your mks user password and close the window.
Restoring Settings
The new version of Klipper and Moonraker keep their save settings in a different location. We will copy them there.
cp -r ~/klipper_config/* ~/printer_data/configConnecting Klippy
The location of the klippy_uds_address has changed. If it tells you "klippy not connected" this may help repair it. From the web interface, edit moonraker.conf to change it to this:
klippy_uds_address: ~/printer_data/comms/klippy.sockRestoring Qidi Gcode functionality
QIDI added a feature that automatically mounted USB drives which is nice. But in their infinite wisdom, they decided to hard-code the location in their client. So, updating Klipper and Moonraker breaks it. There are 2 methods to fix it.
Patch it:
sed -i 's/printer_data/gcodes/gcode_files/g' ~/printer_data/systemd/moonraker.envThis method will keep the functionality and directories as it was, but may break in a future update.
Create a Symlink:
To fix it, a folder needs to be deleted and the old folder symlinked into its place, and the config changed. This method should last longer.
rm -r /home/mks/printer_data/gcodes/ln -s /home/mks/gcode_files /home/mks/printer_data/gcodessed -i 's:~/gcode_files:~/printer_data/gcodes:g' ~/printer_data/config/printer.cfgUpdating the printer.cfg
Some commands in printer.cfg have been changed. To update them, run:
sed -i 's:printer.probe\["x_offset"\]:printer.configfile.settings.probe.x_offset:g' ~/printer_data/config/printer.cfgsed -i 's:printer.probe["y_offset"]:printer.configfile.settings.probe.y_offset:g' ~/printer_data/config/printer.cfgPrecautions and incompatibilities
The versions of Klipper, Moonraker, and Fluidd installed will be updated. Avoid using the Qidi updates, it will overwrite the updated installation and the versions may be incompatible.
There is an issue with saving the z offset if you run the official/mainline version of Klipper. The software Qidi runs on the machine saves it's own copy of the zoffset. It interferes with klipper by adding it's copy of the zoffset to klippers zoffset resulting in either printing in the air, or grinding into your print bed.
No Comments