Adding USB 2.0 ports on the X-Max 3
You are the owner of a X-Max3 printer and you are looking for more USB 2.0 port on your printer?
Maybe for a second webcam, for example ...
I may have a nice solution for you ; but it will require some (limited) soldering skills, a good soldering iron (= temperature regulated) AND some hardware to ground yourself correctly.
BIG DISCLAIMER :
The process I describe here below is what I did on my printer, and it seems to work correcly in my case : my printer is still working correctly and my webcam is recognized on the new USB ports ...
BUT
This process obviously voids the warranty of your printer !
Your hardware (motherboard revision, etc.) may be different and not be compatible with the modification I did. YMMV !
Touching and/or soldering on your motherboard may destroy it if not properly done. Too much heat or static electricity discharges will do very bad things to a PCB and/or the components on it.
--> Be warned, proceed only if you accept those risks and do not blame me if you fail or end-up with a broken printer.
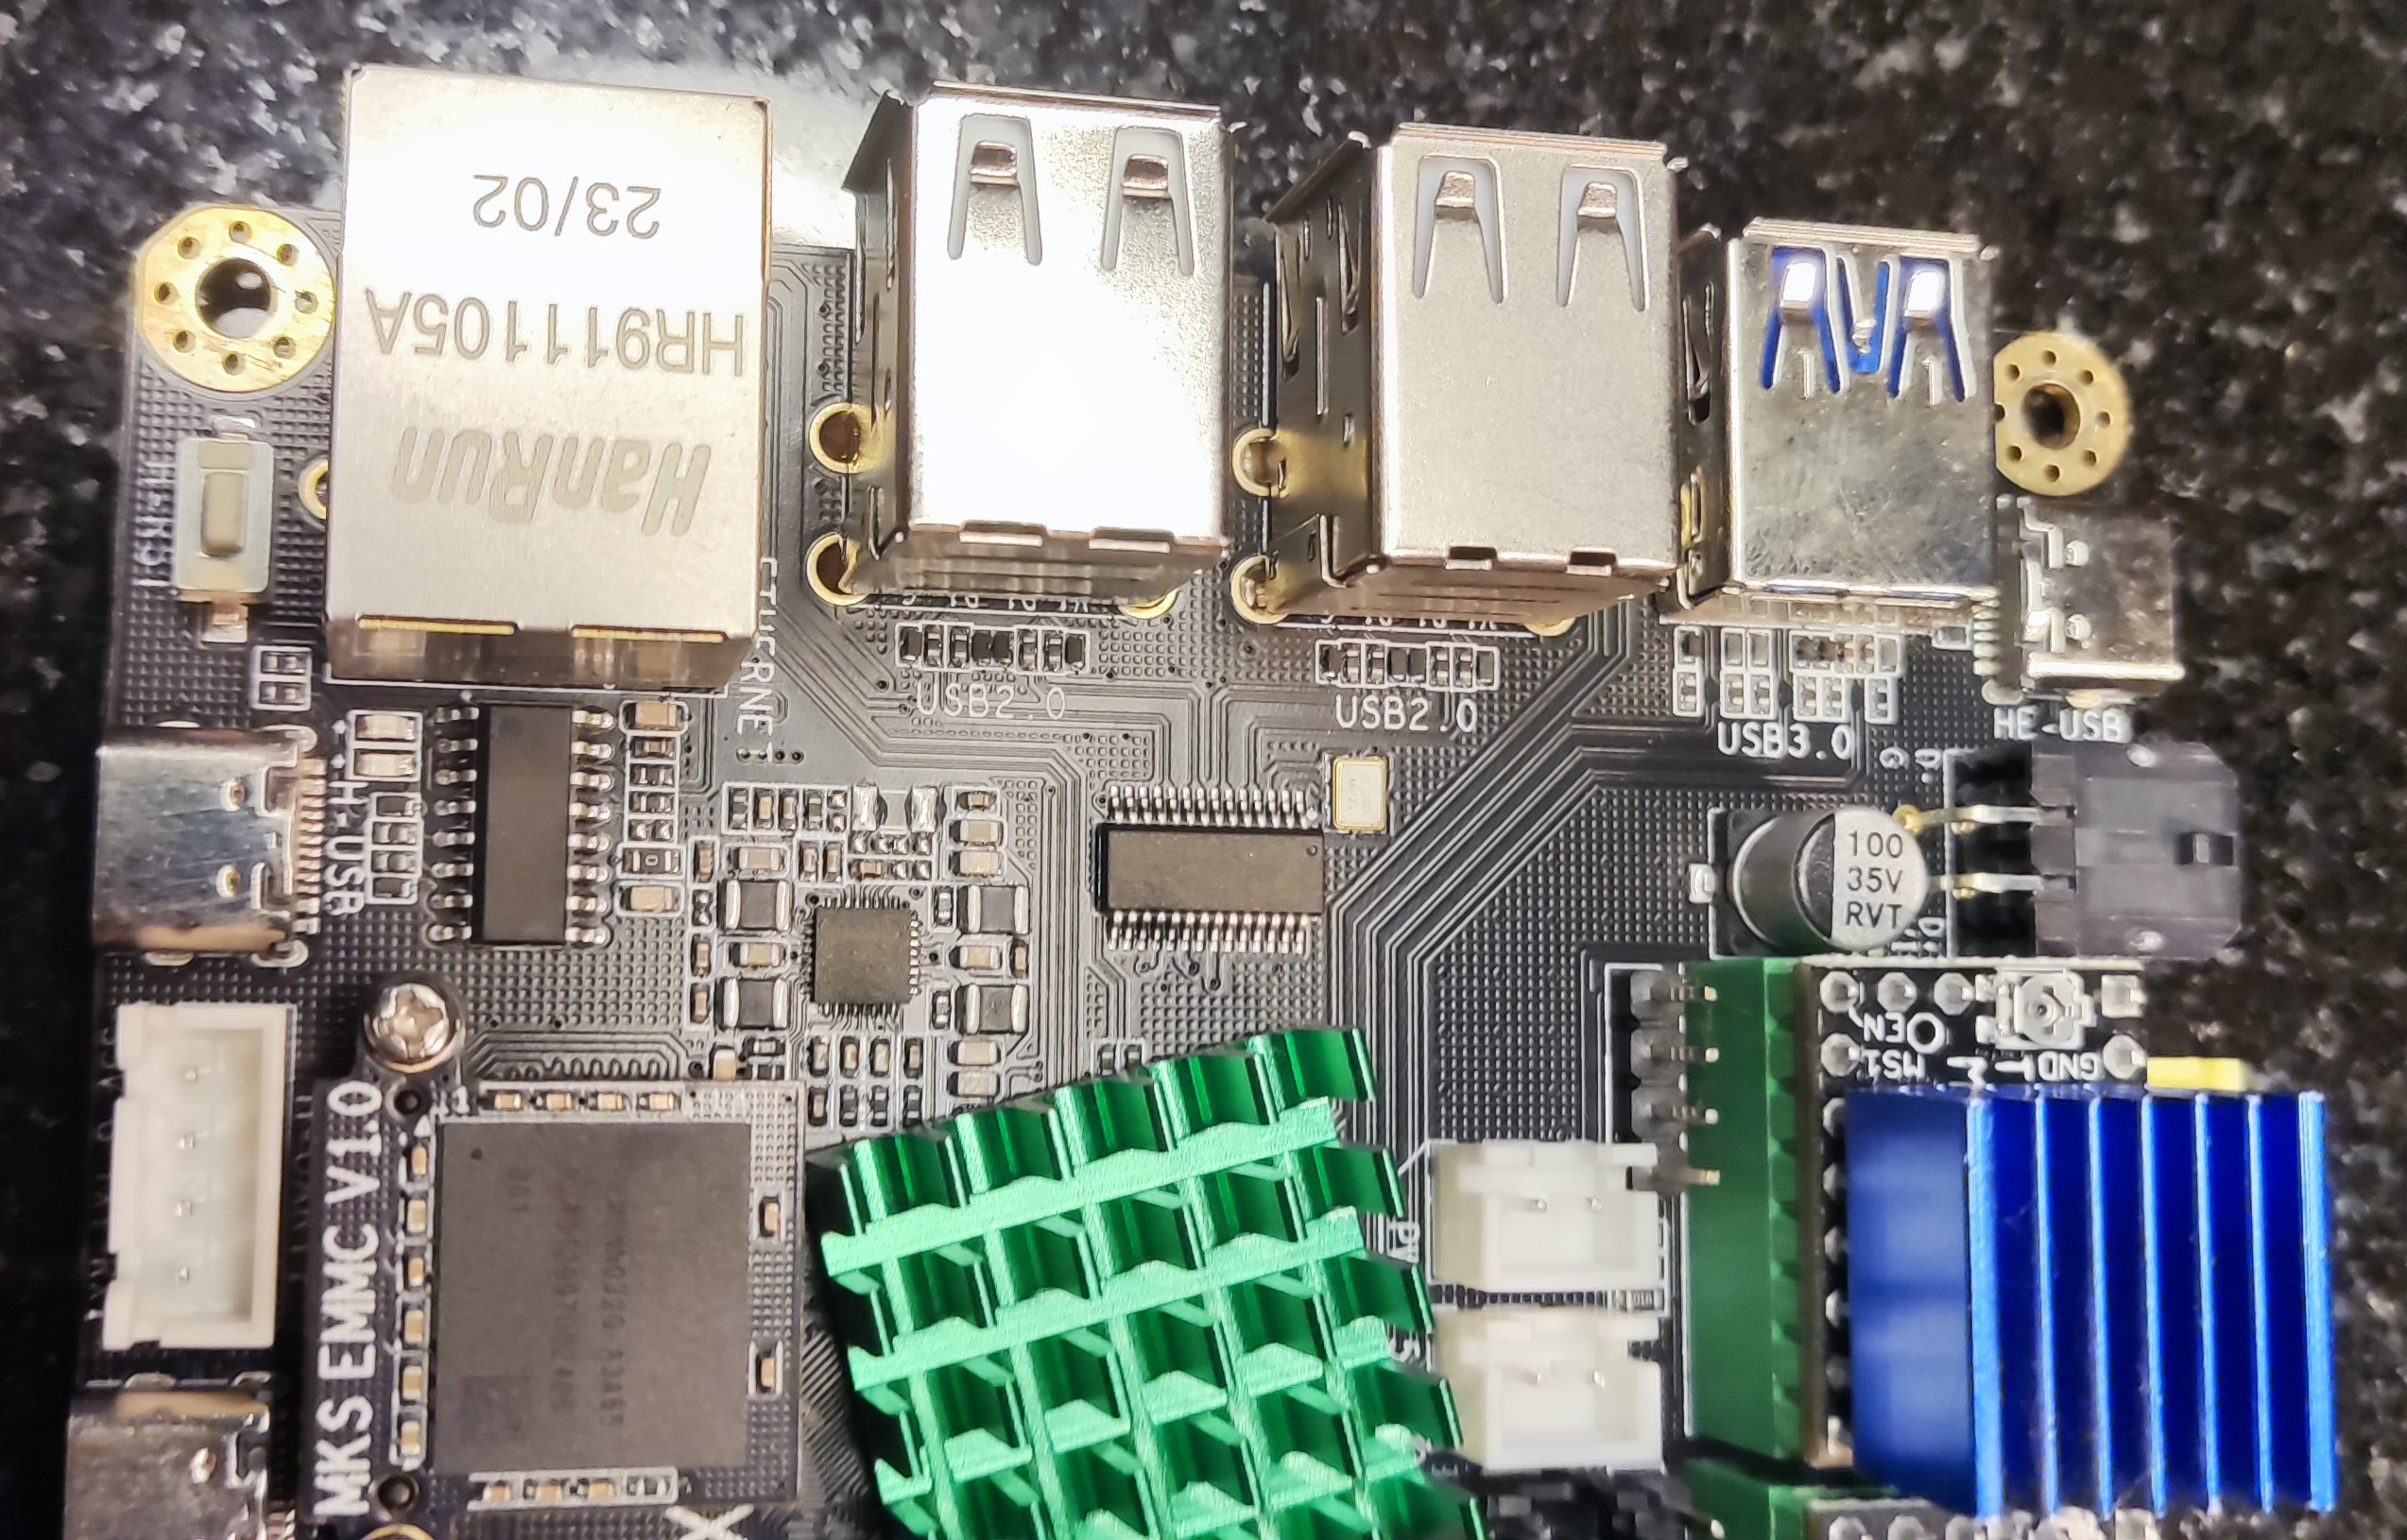
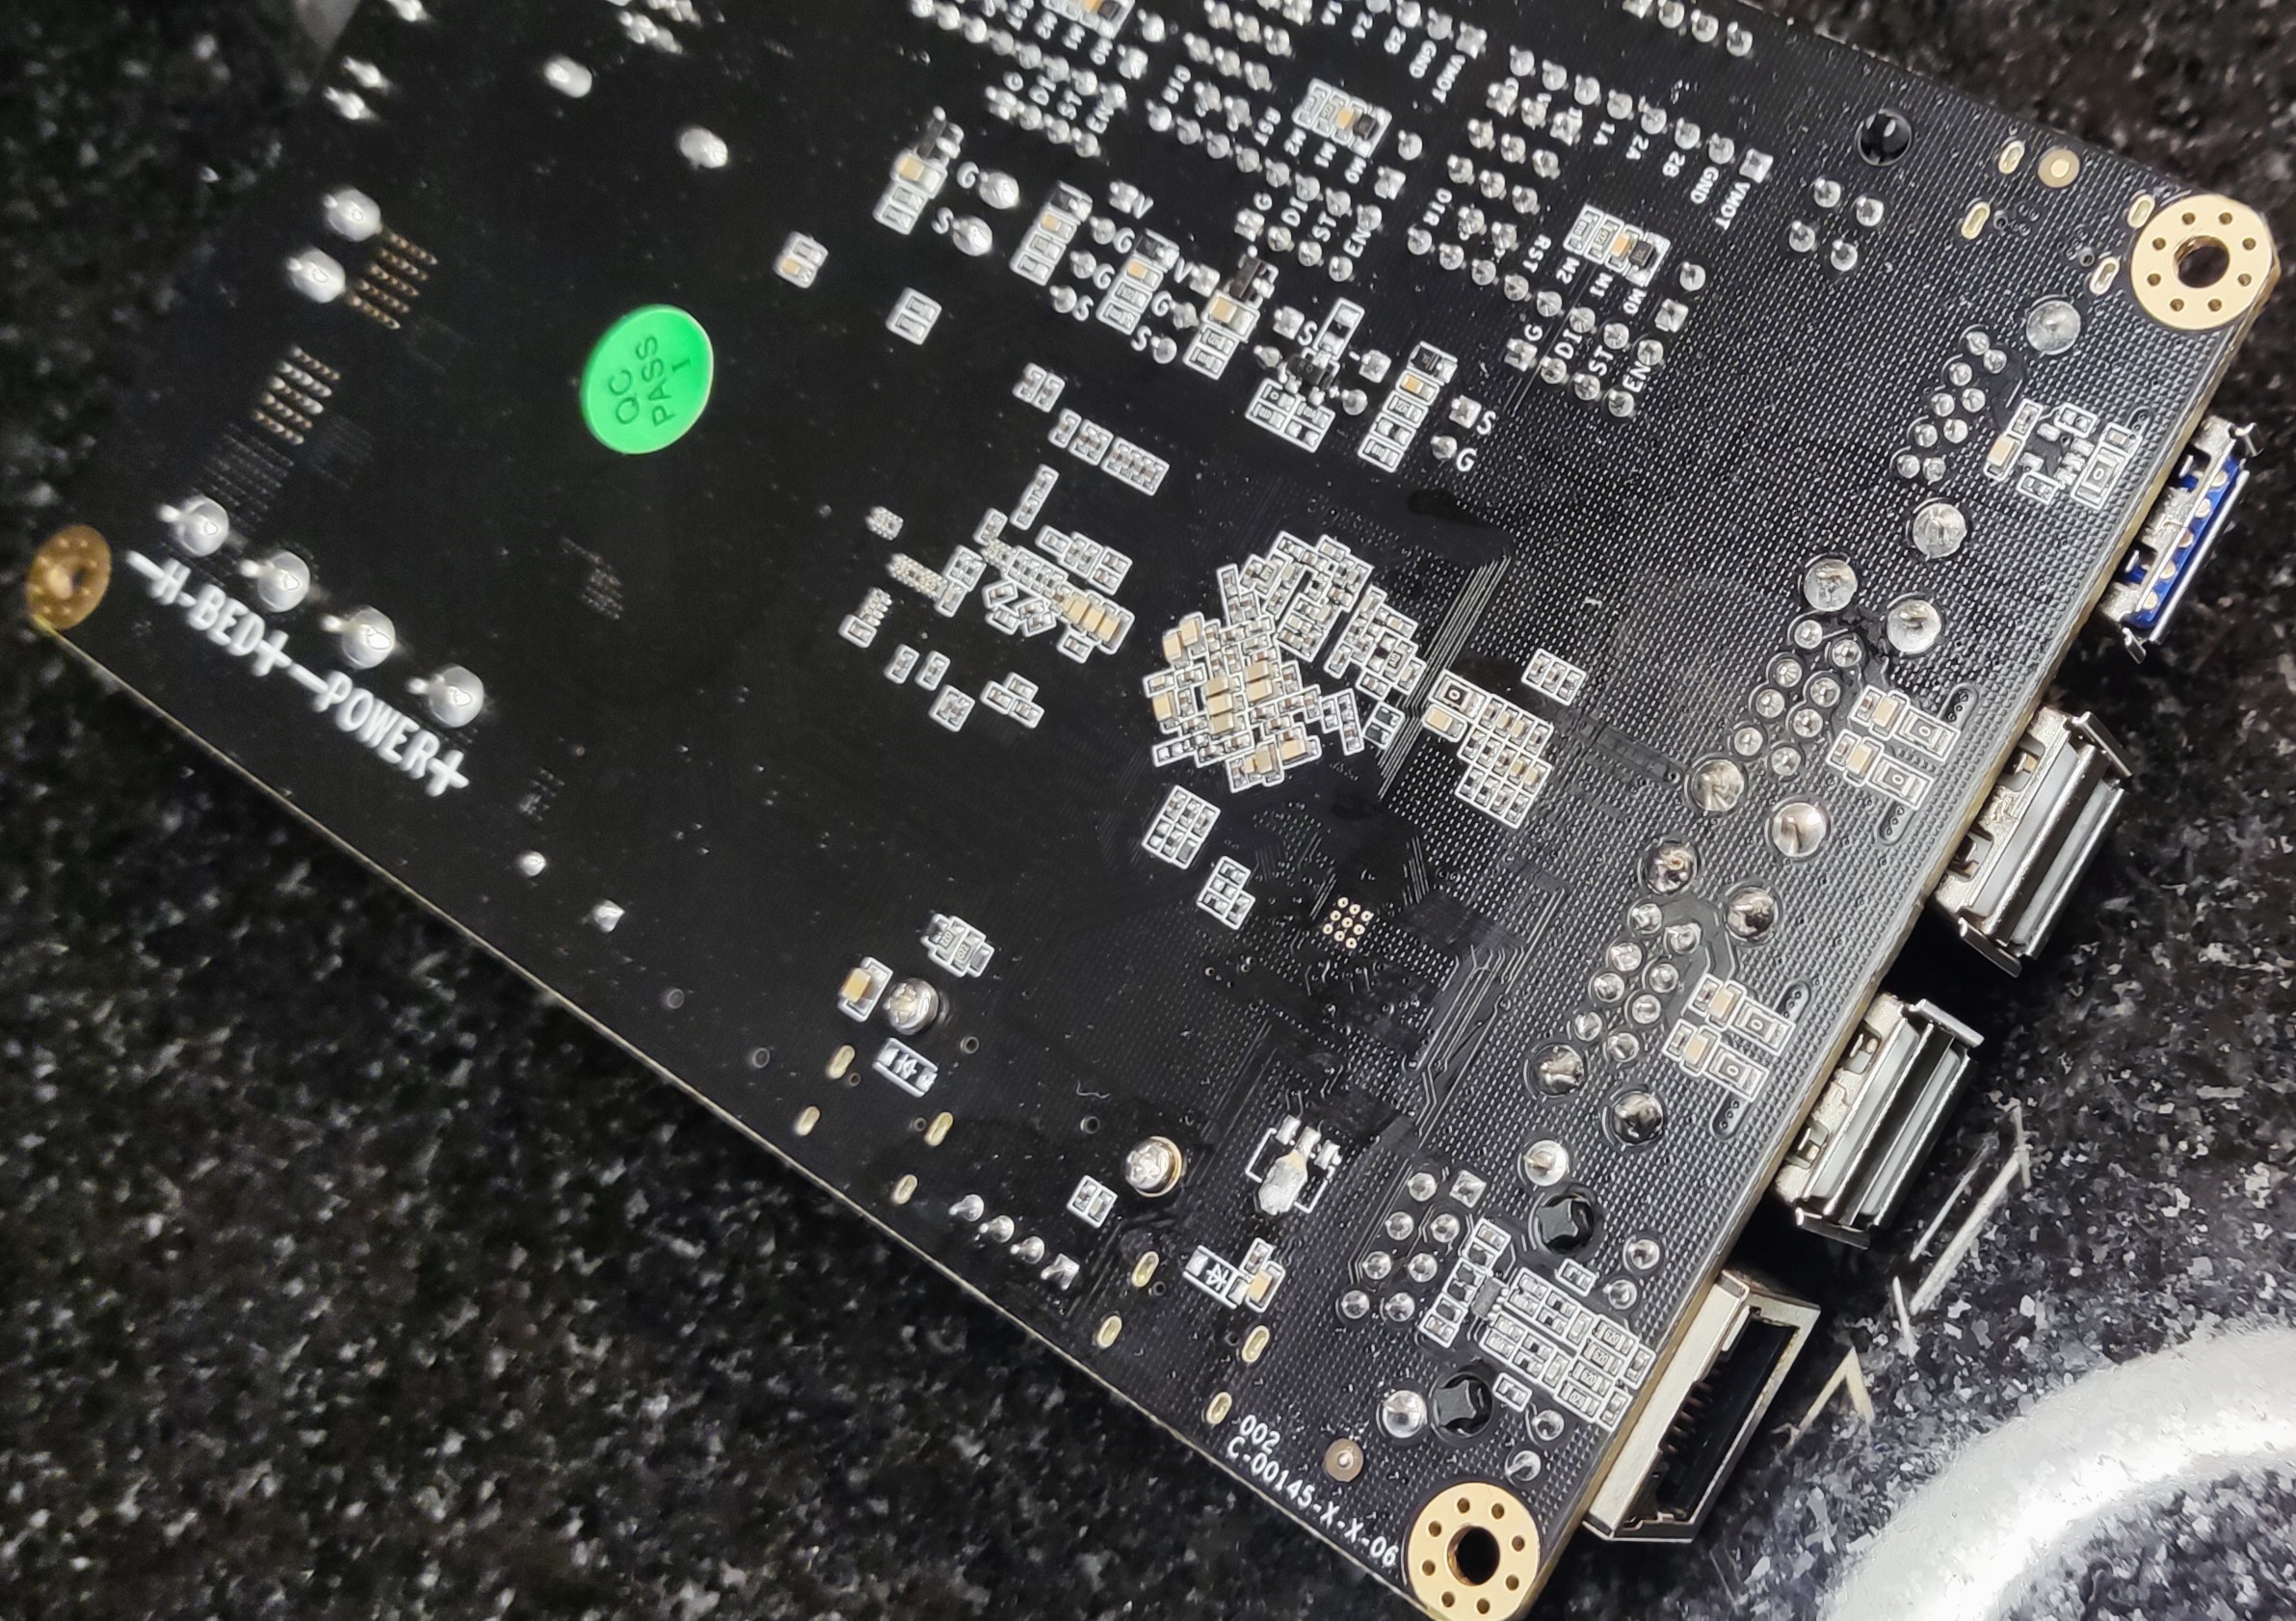
If you look at the printer mainboard, you will see there is some room left for a second dual USB port socket to be added on the PCB , well, at least there was some on the mainboard of my printer.
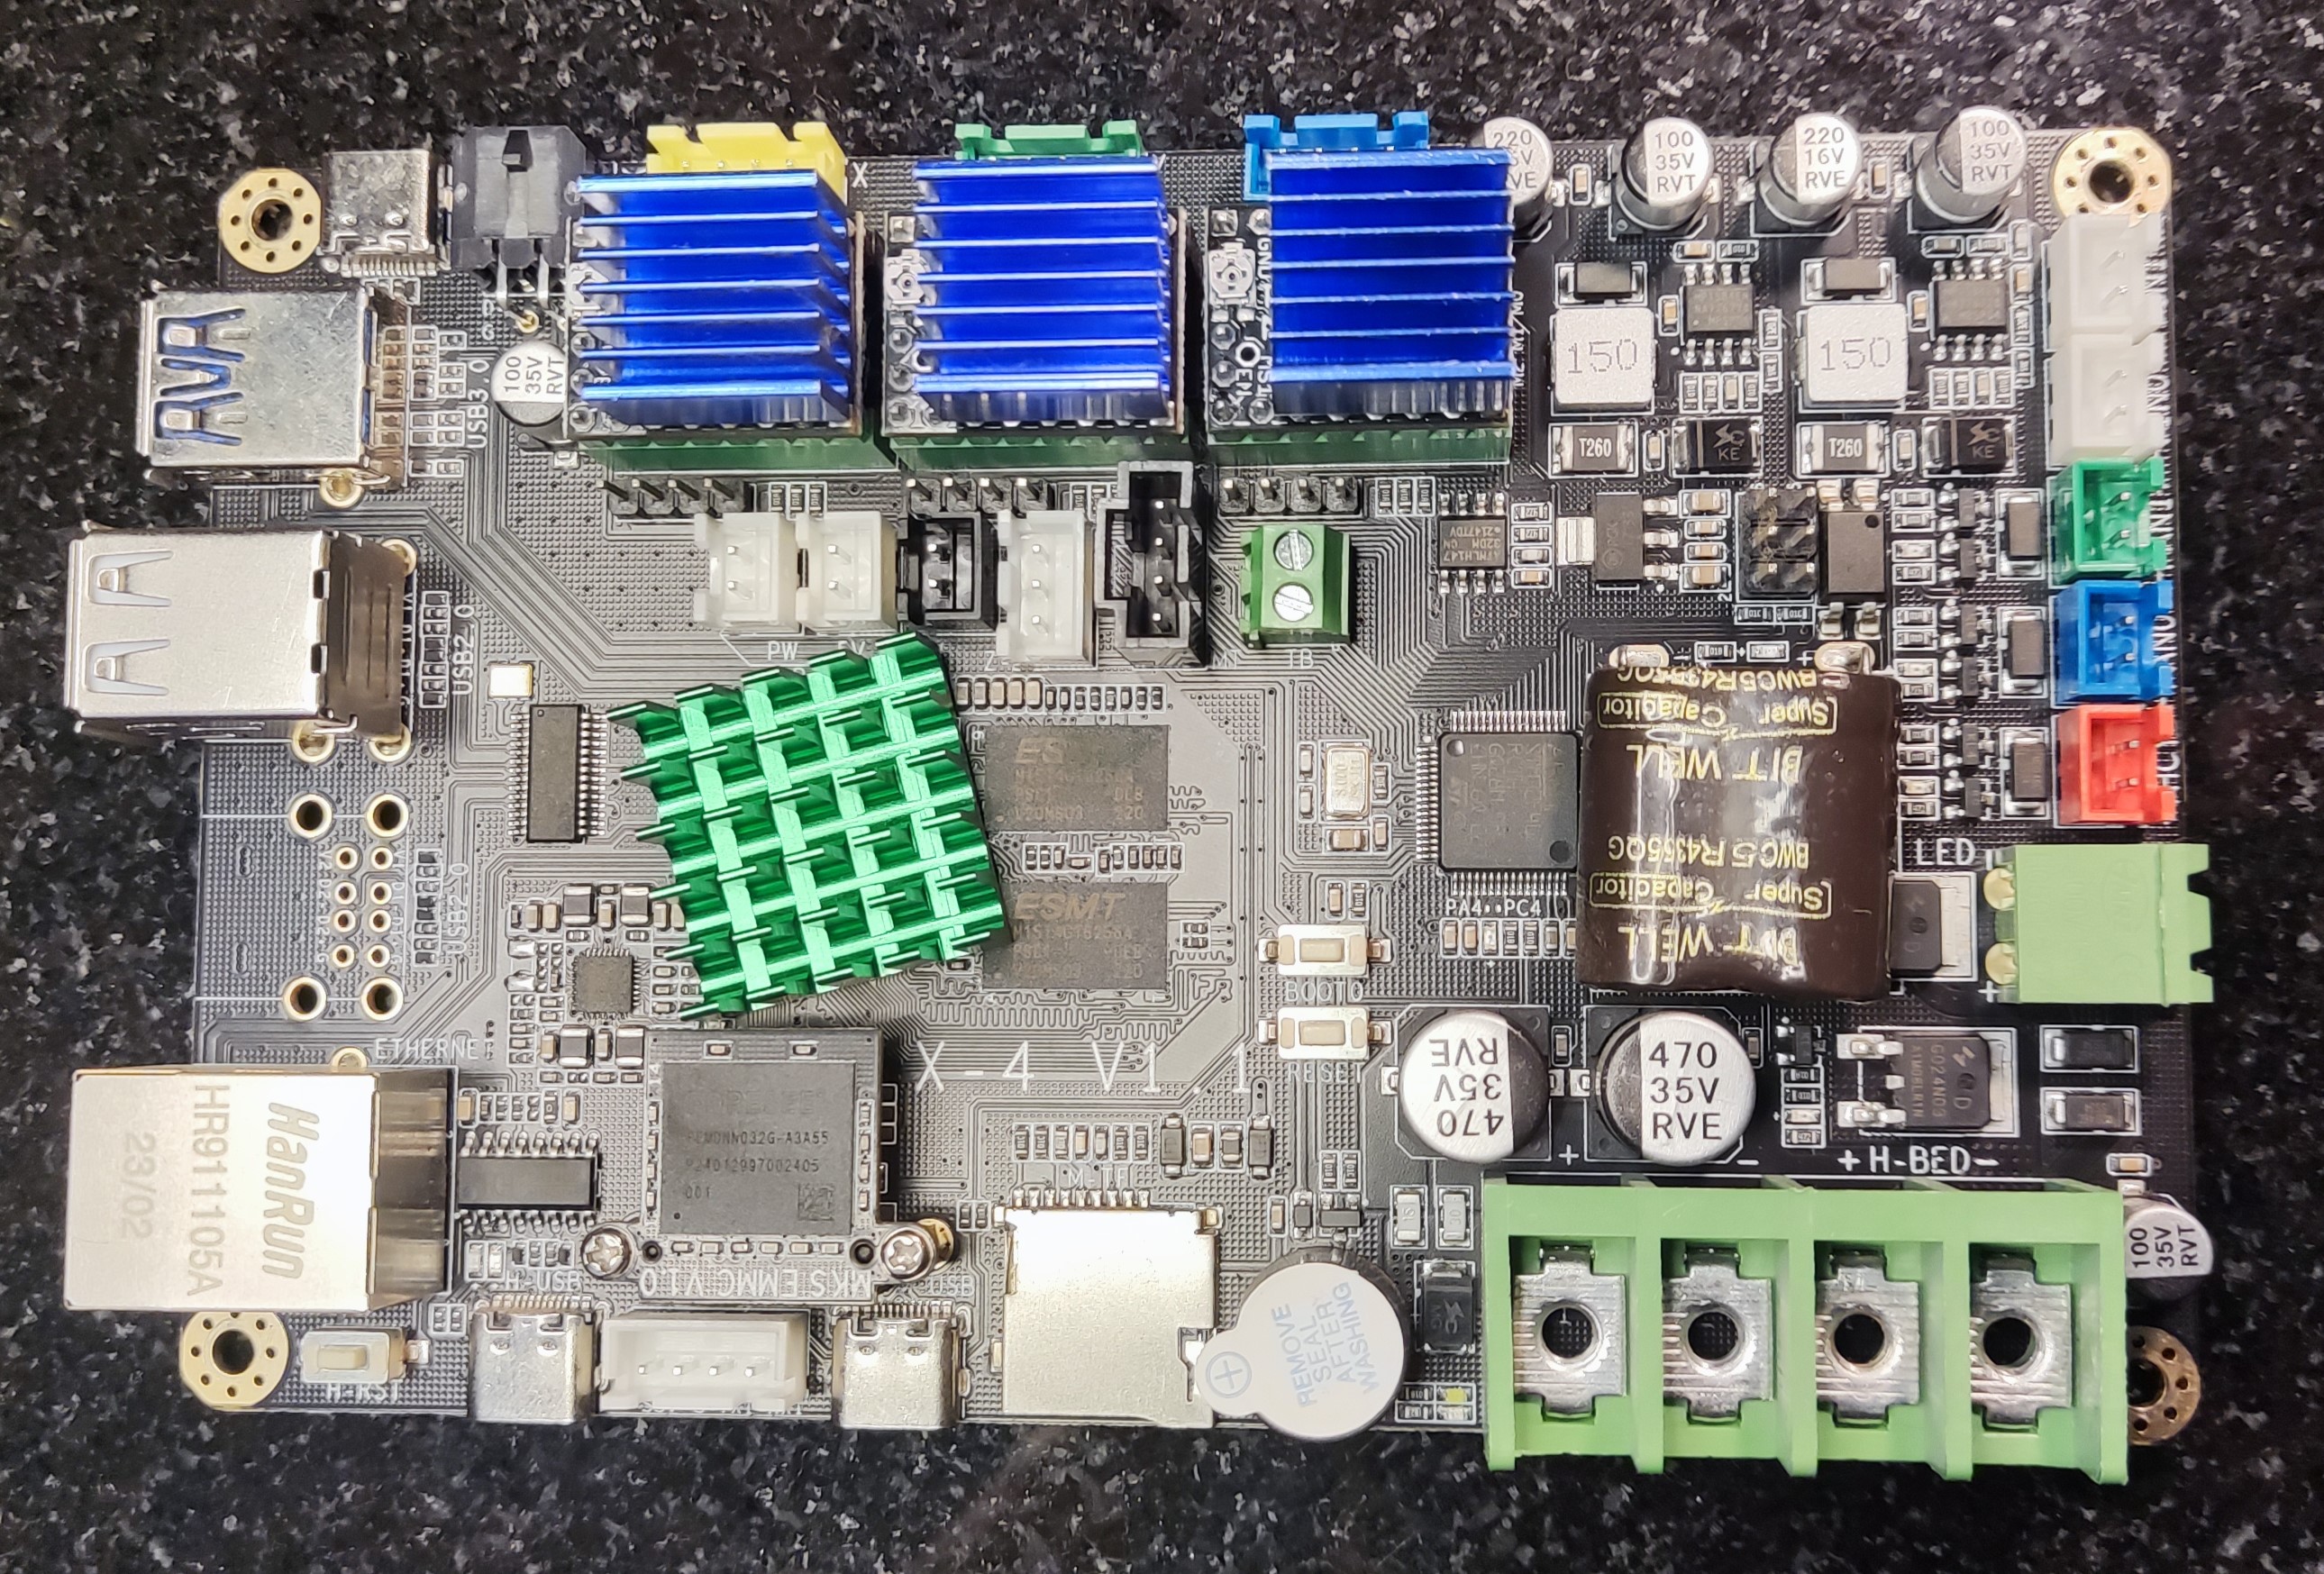
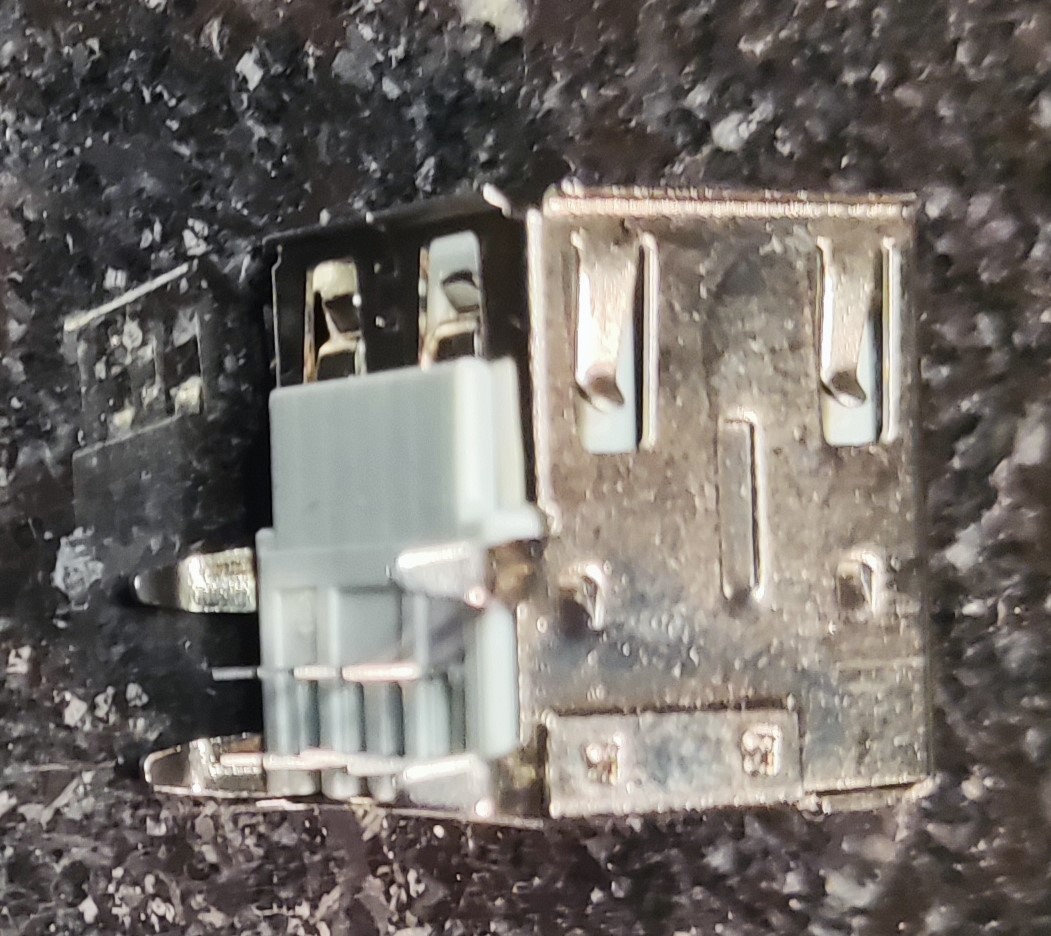
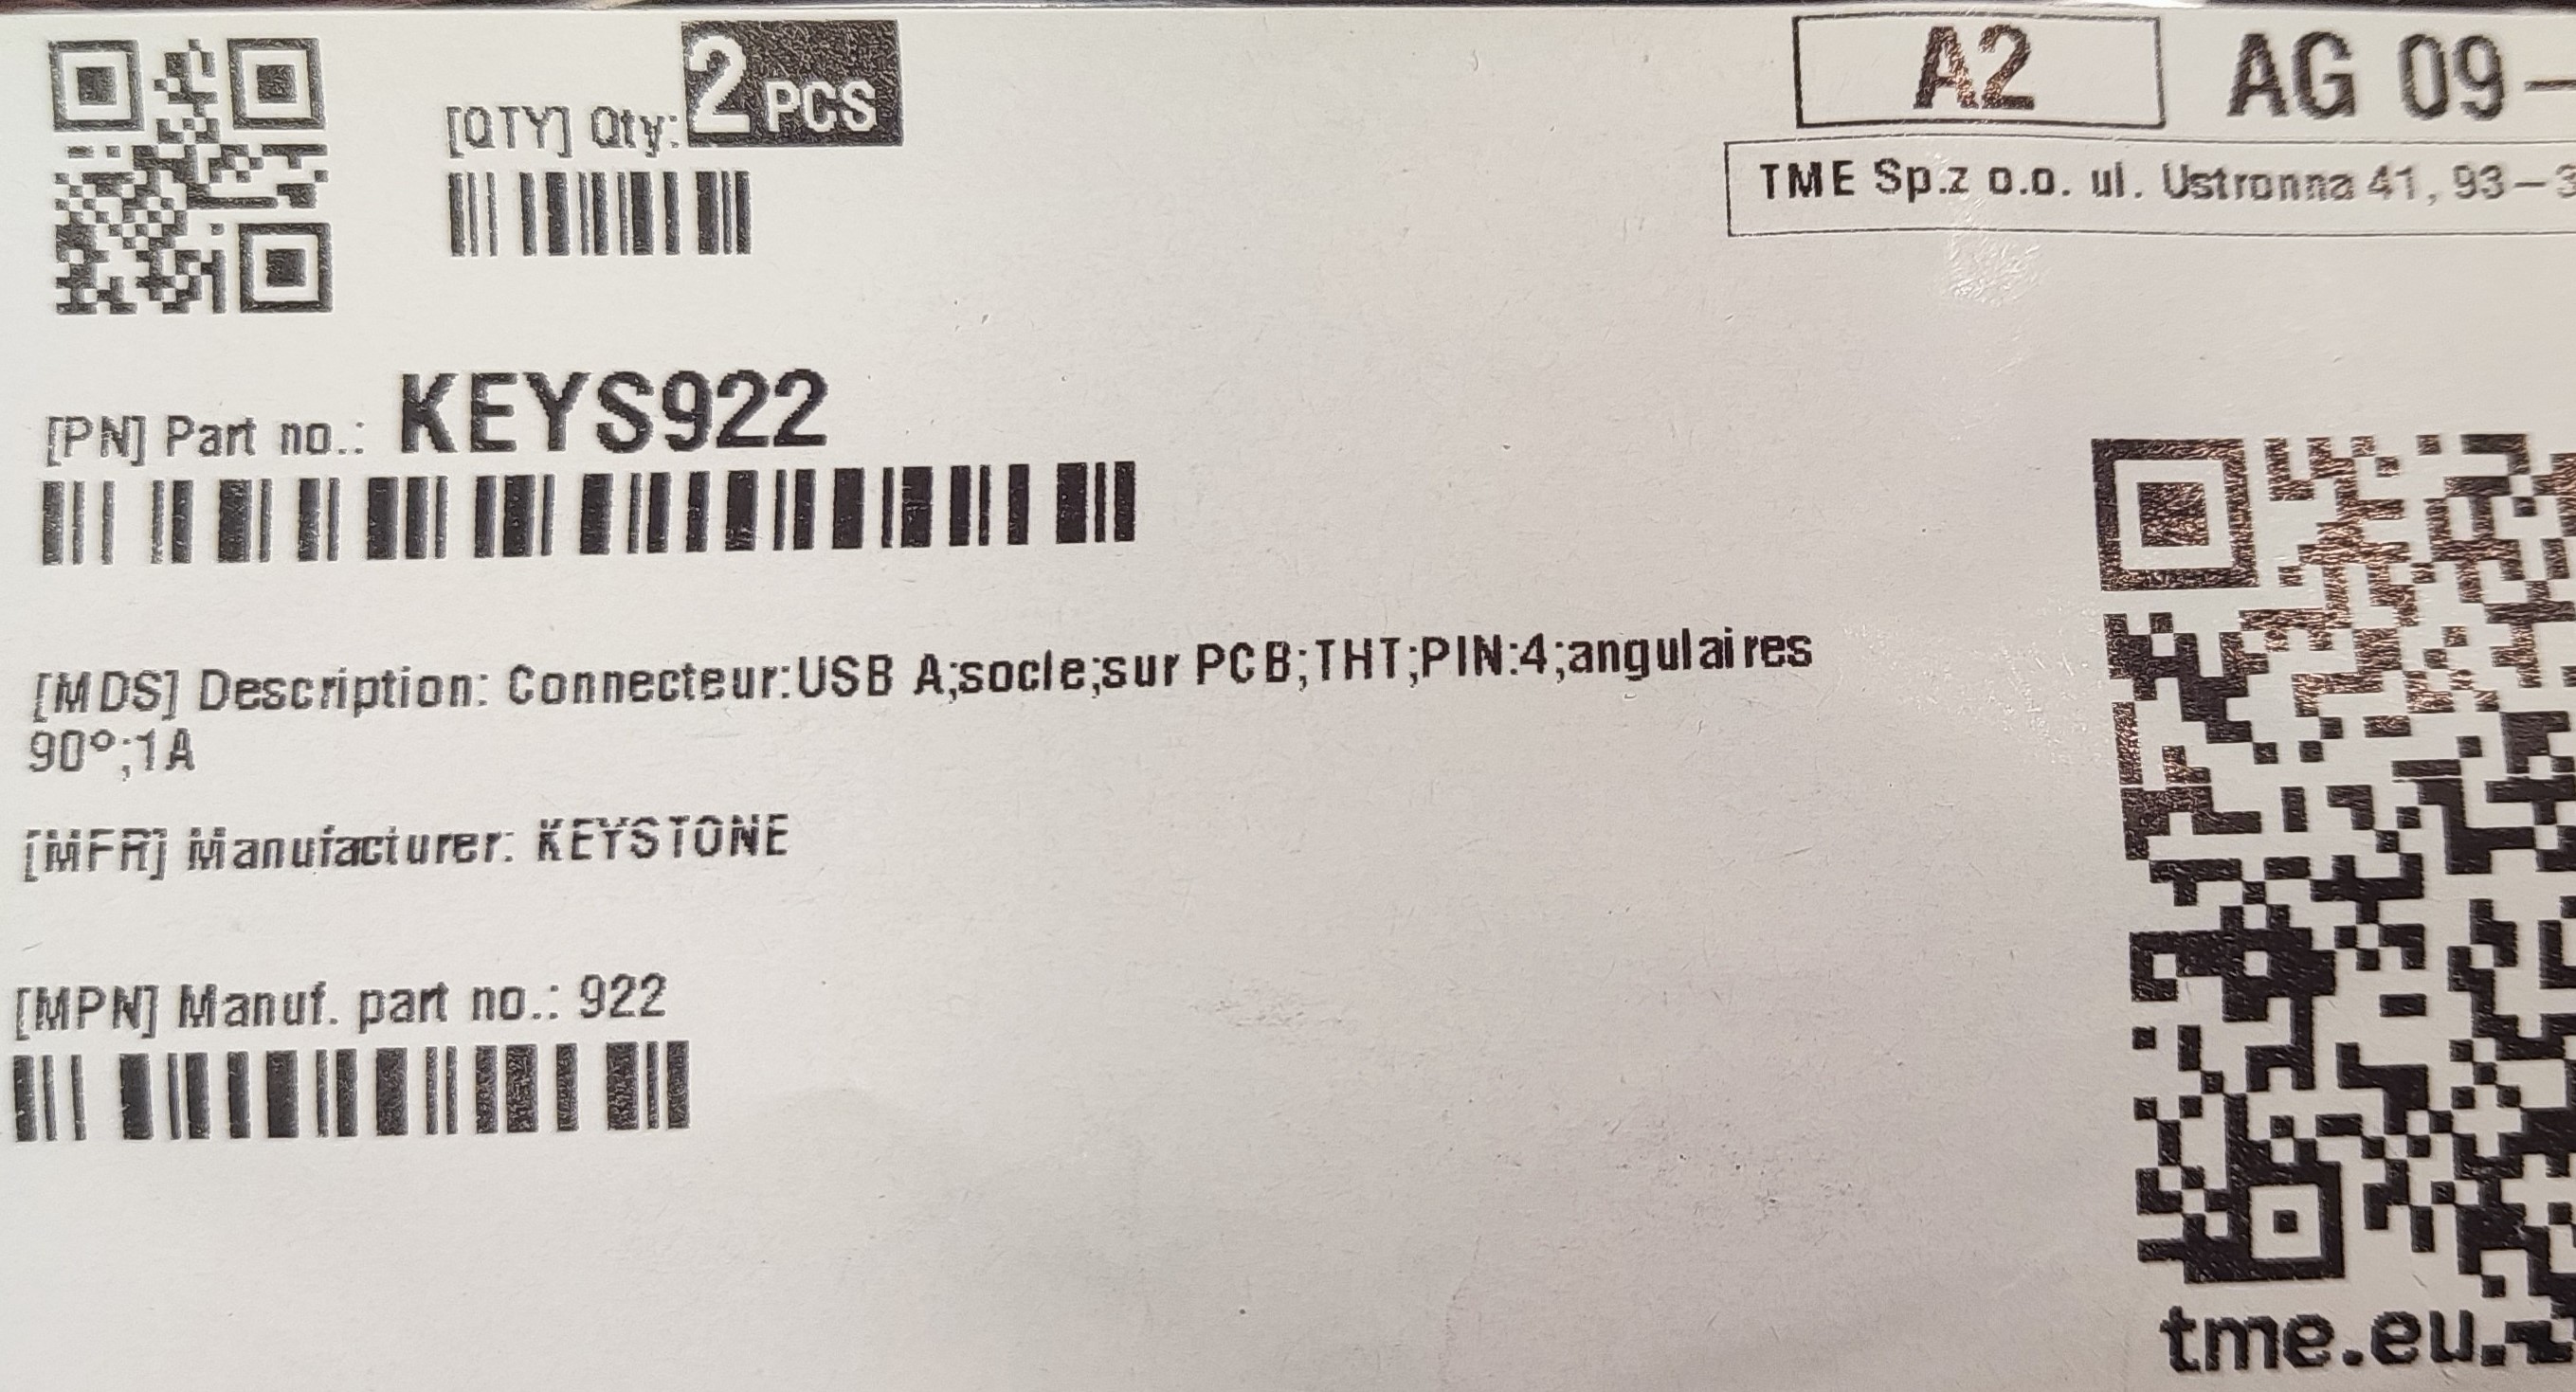
For a very limited amount of money, I could buy a new dual USB-A socket looking exctly identical to the existing USB socket on the motherboard.
I suppose some other refs. will also be compatible, but here is the ref. of what I bought : Brand = "Keystone", part nbr. 922.
I'm usually buying that kind of stuff from www.tme.eu , but I'm quite sure Farnell, DigiKey, Conrad, Mouser, or your preferred local electronic parts store will be able to sell you the same kind of socket.

So, here is the plan :
1) Power the printer OFF and wait a while for the supercap to discharge.
2) Remove the back plate of your printer. Be careful with the attached cable from the fan.
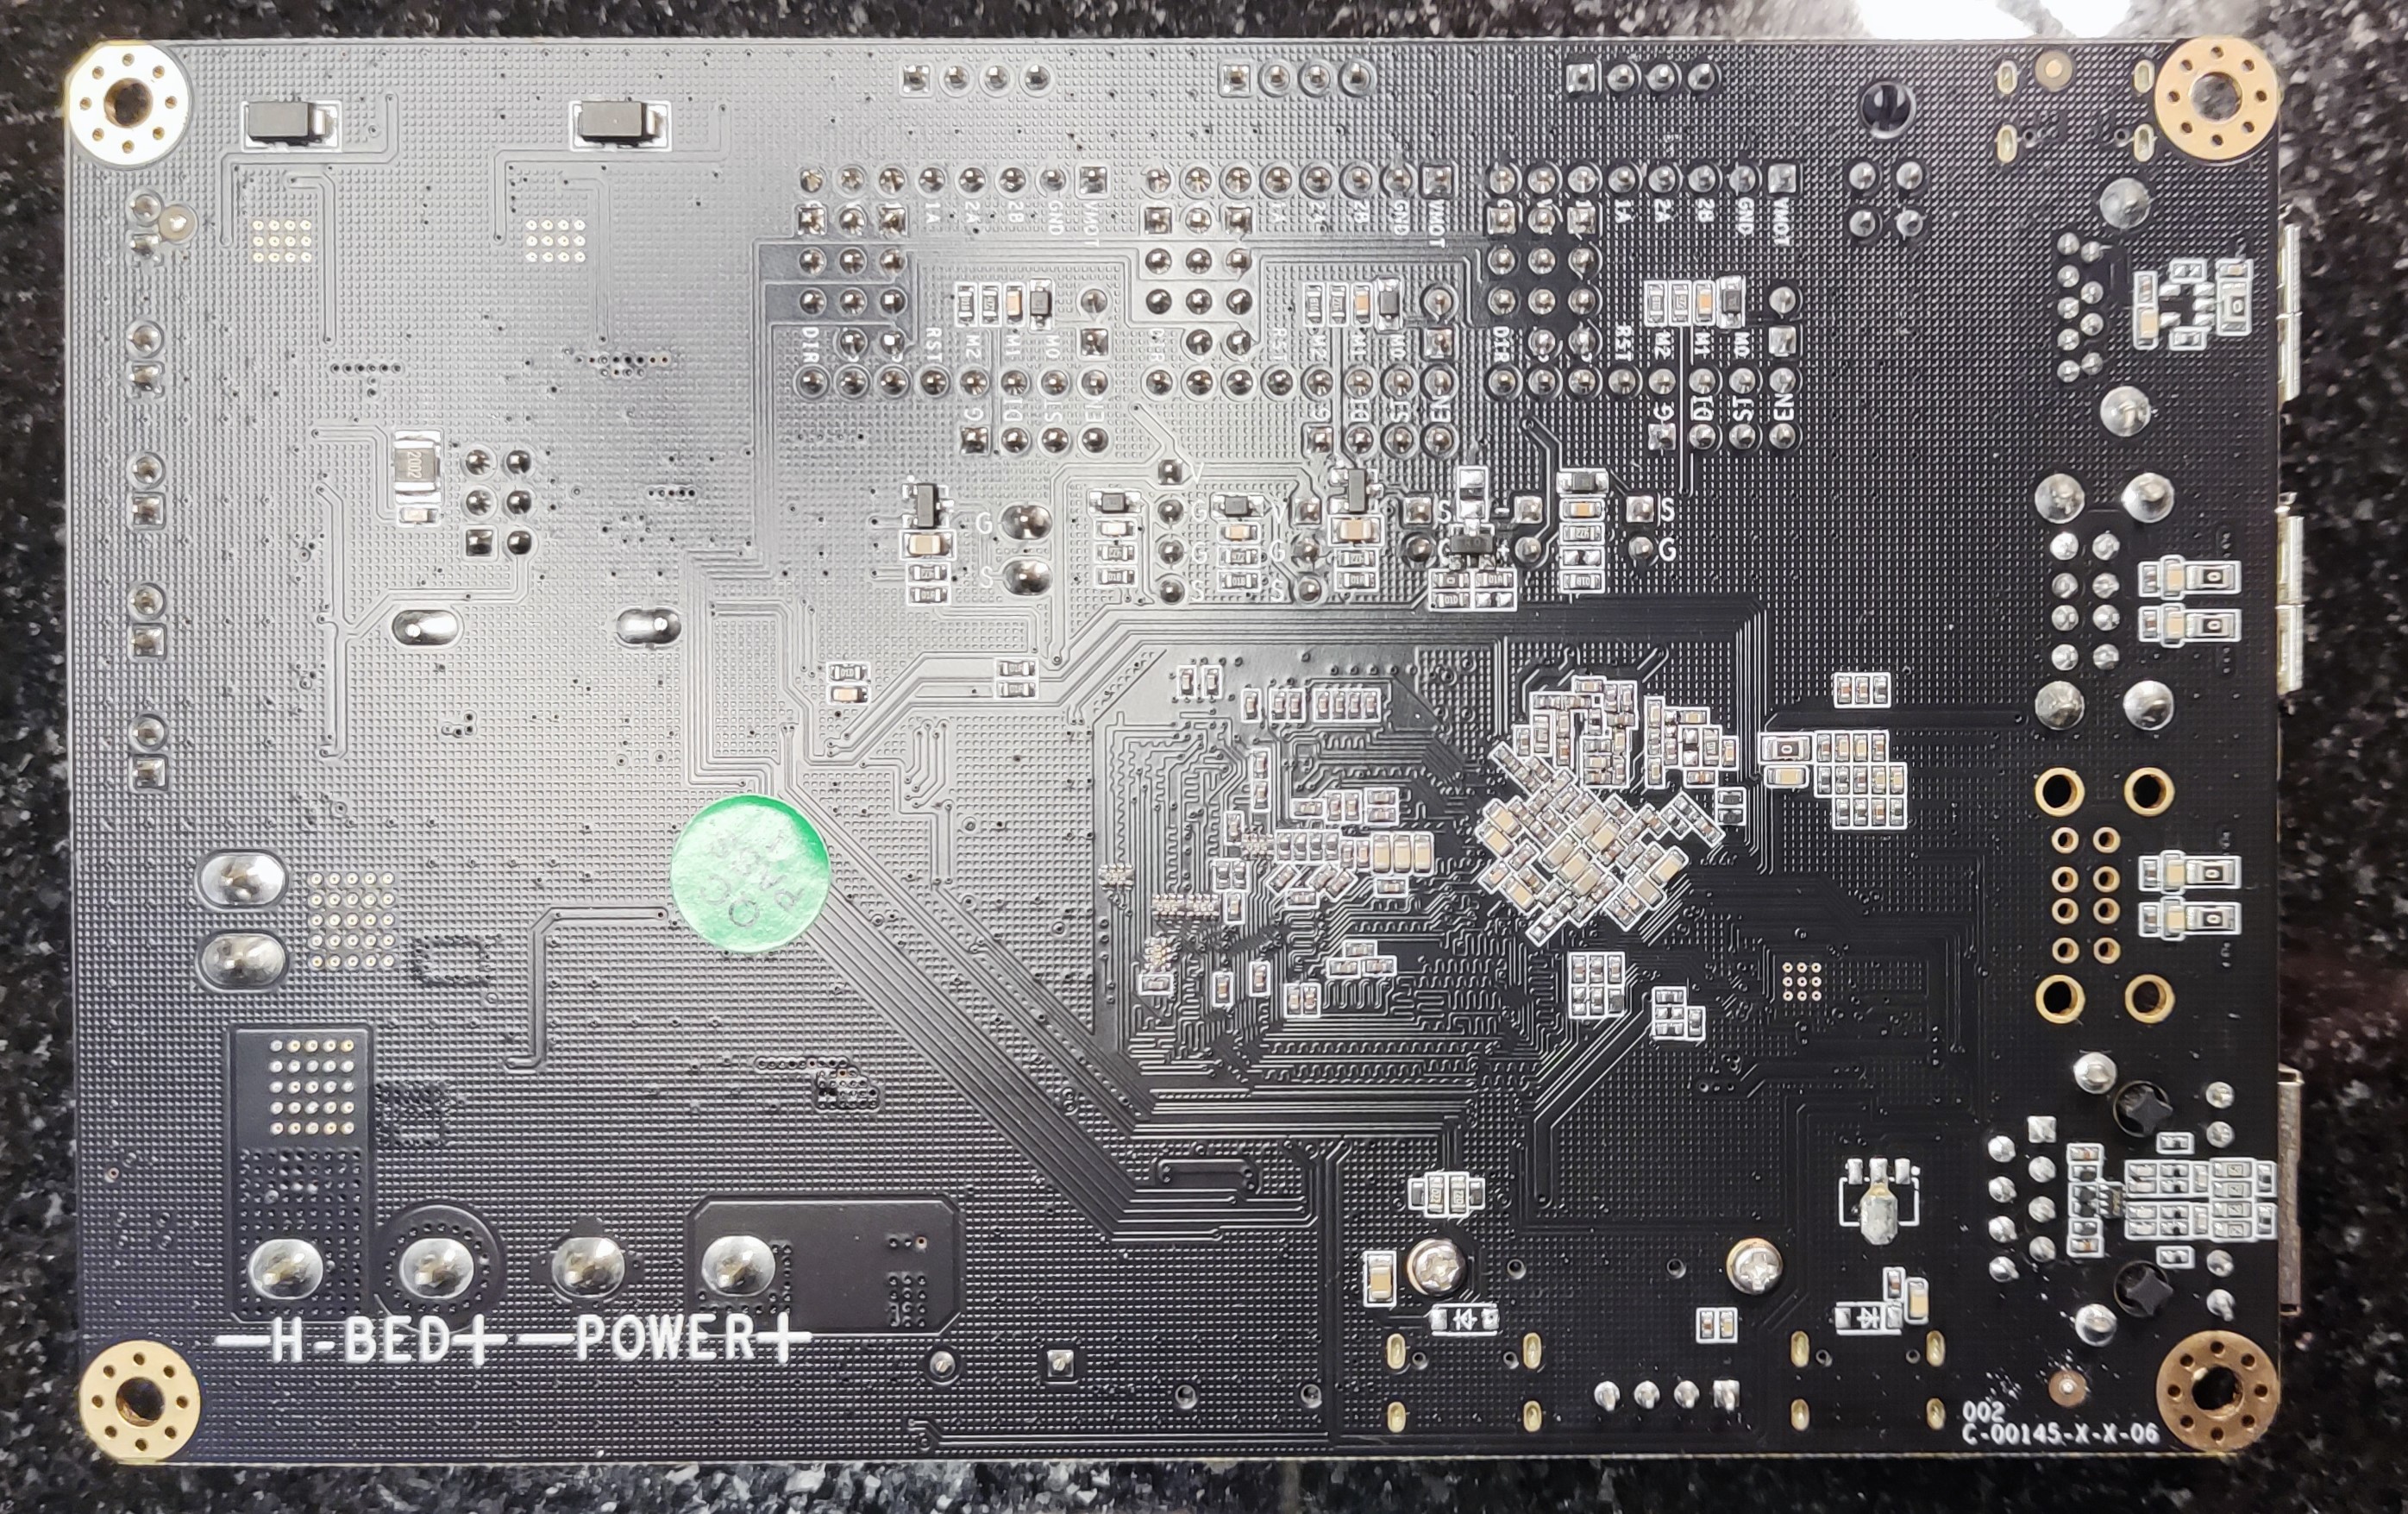
3) Take a few color pictures of the motherboard, including the position of all the cables (will be useful at the end ...).
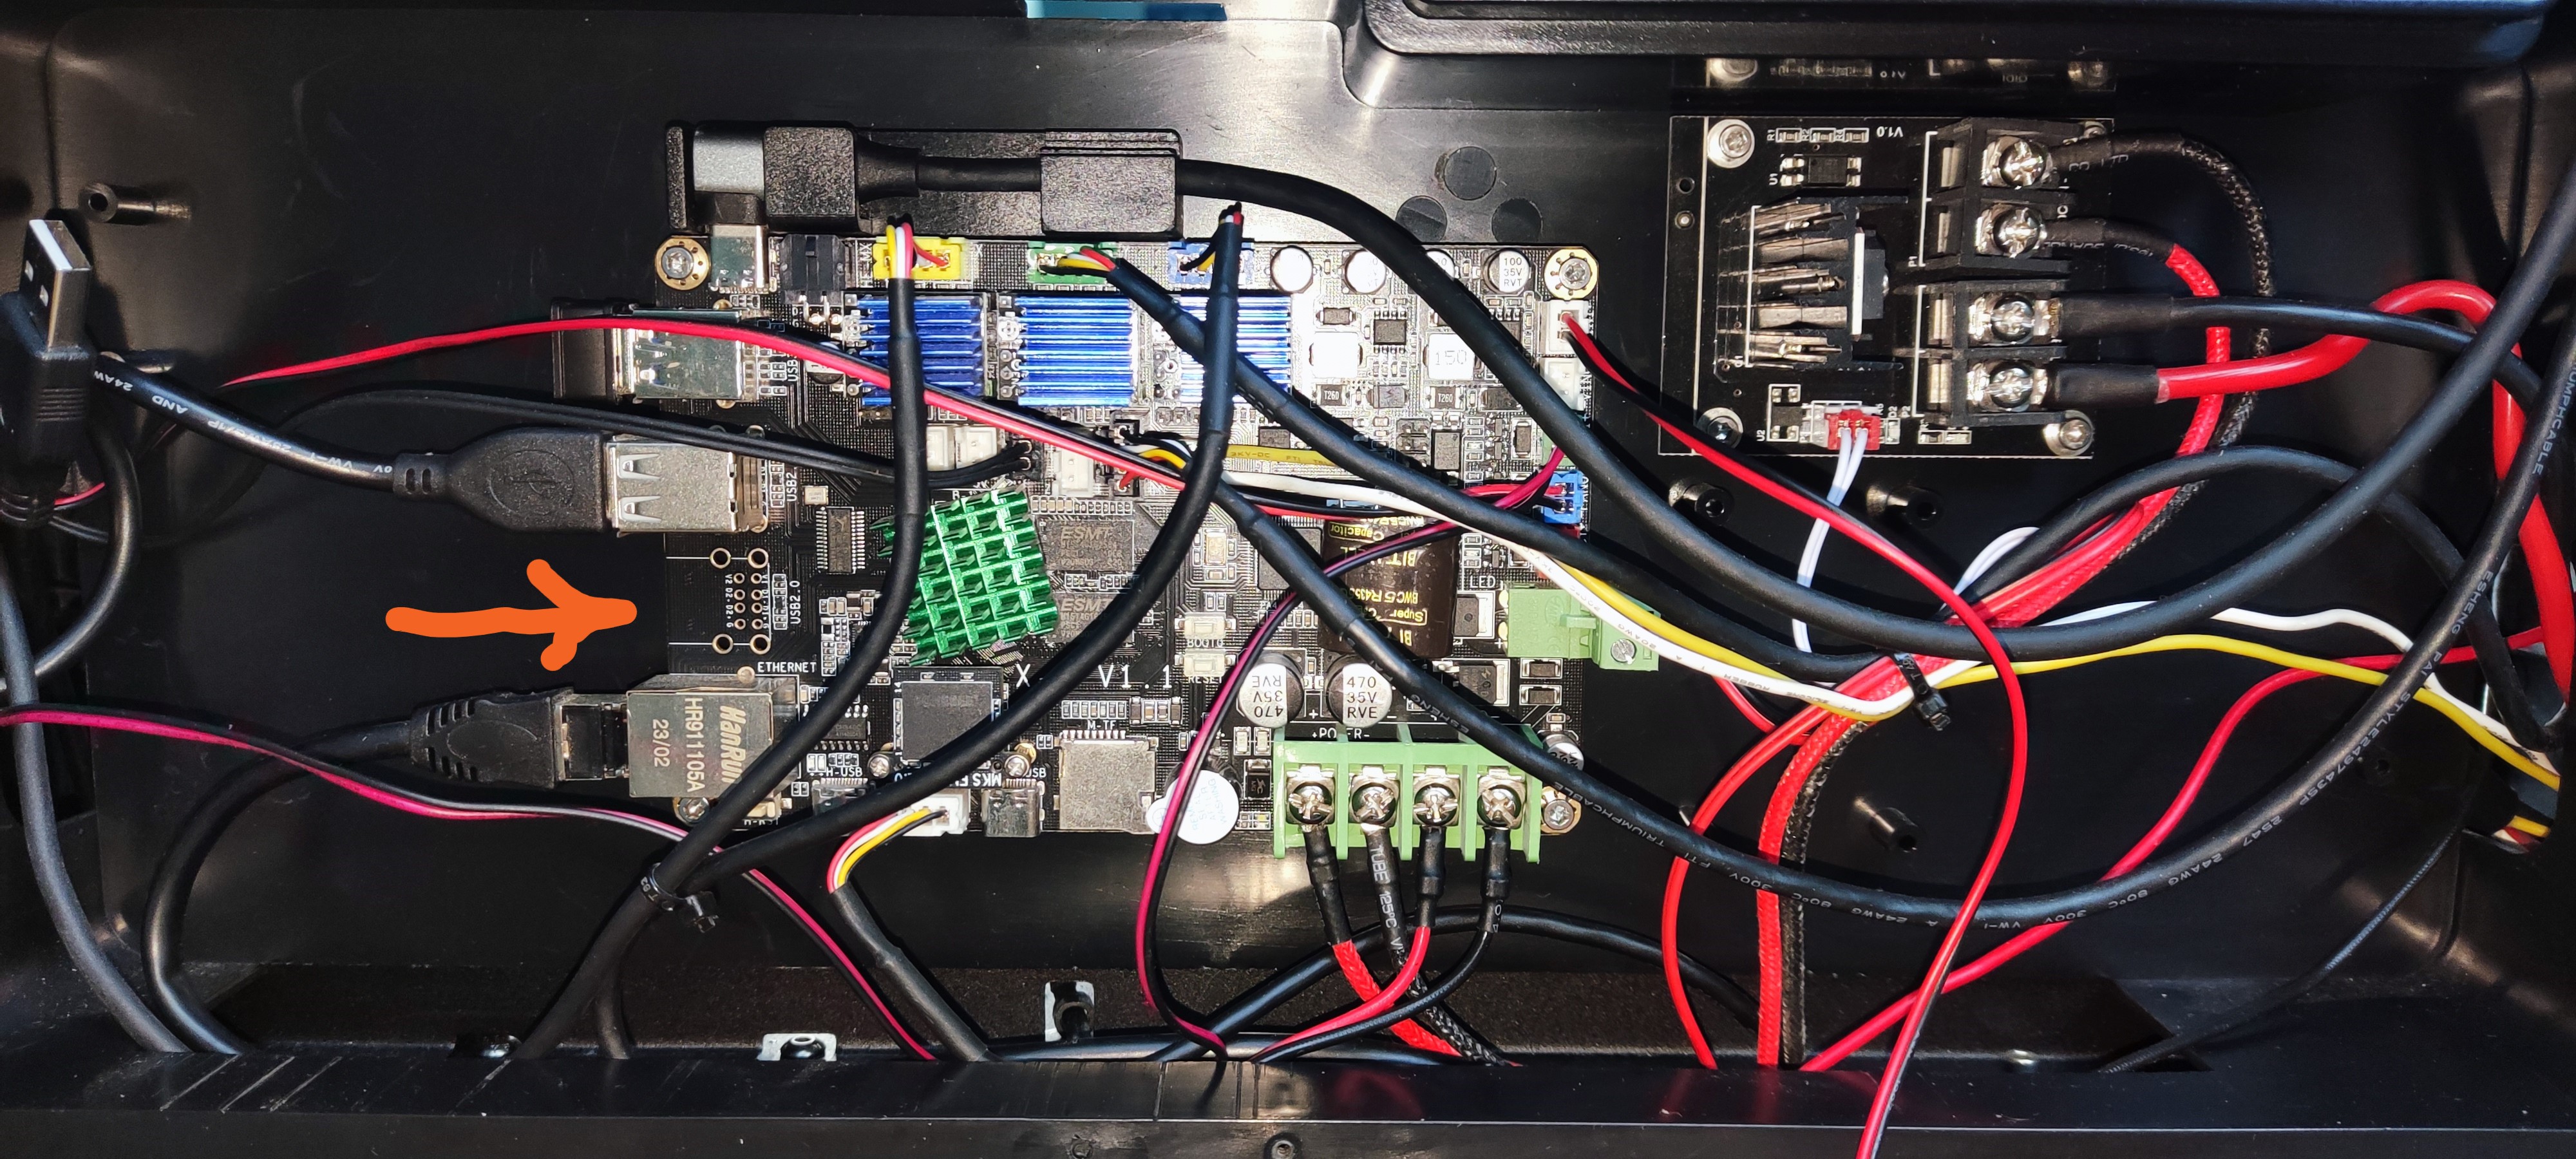
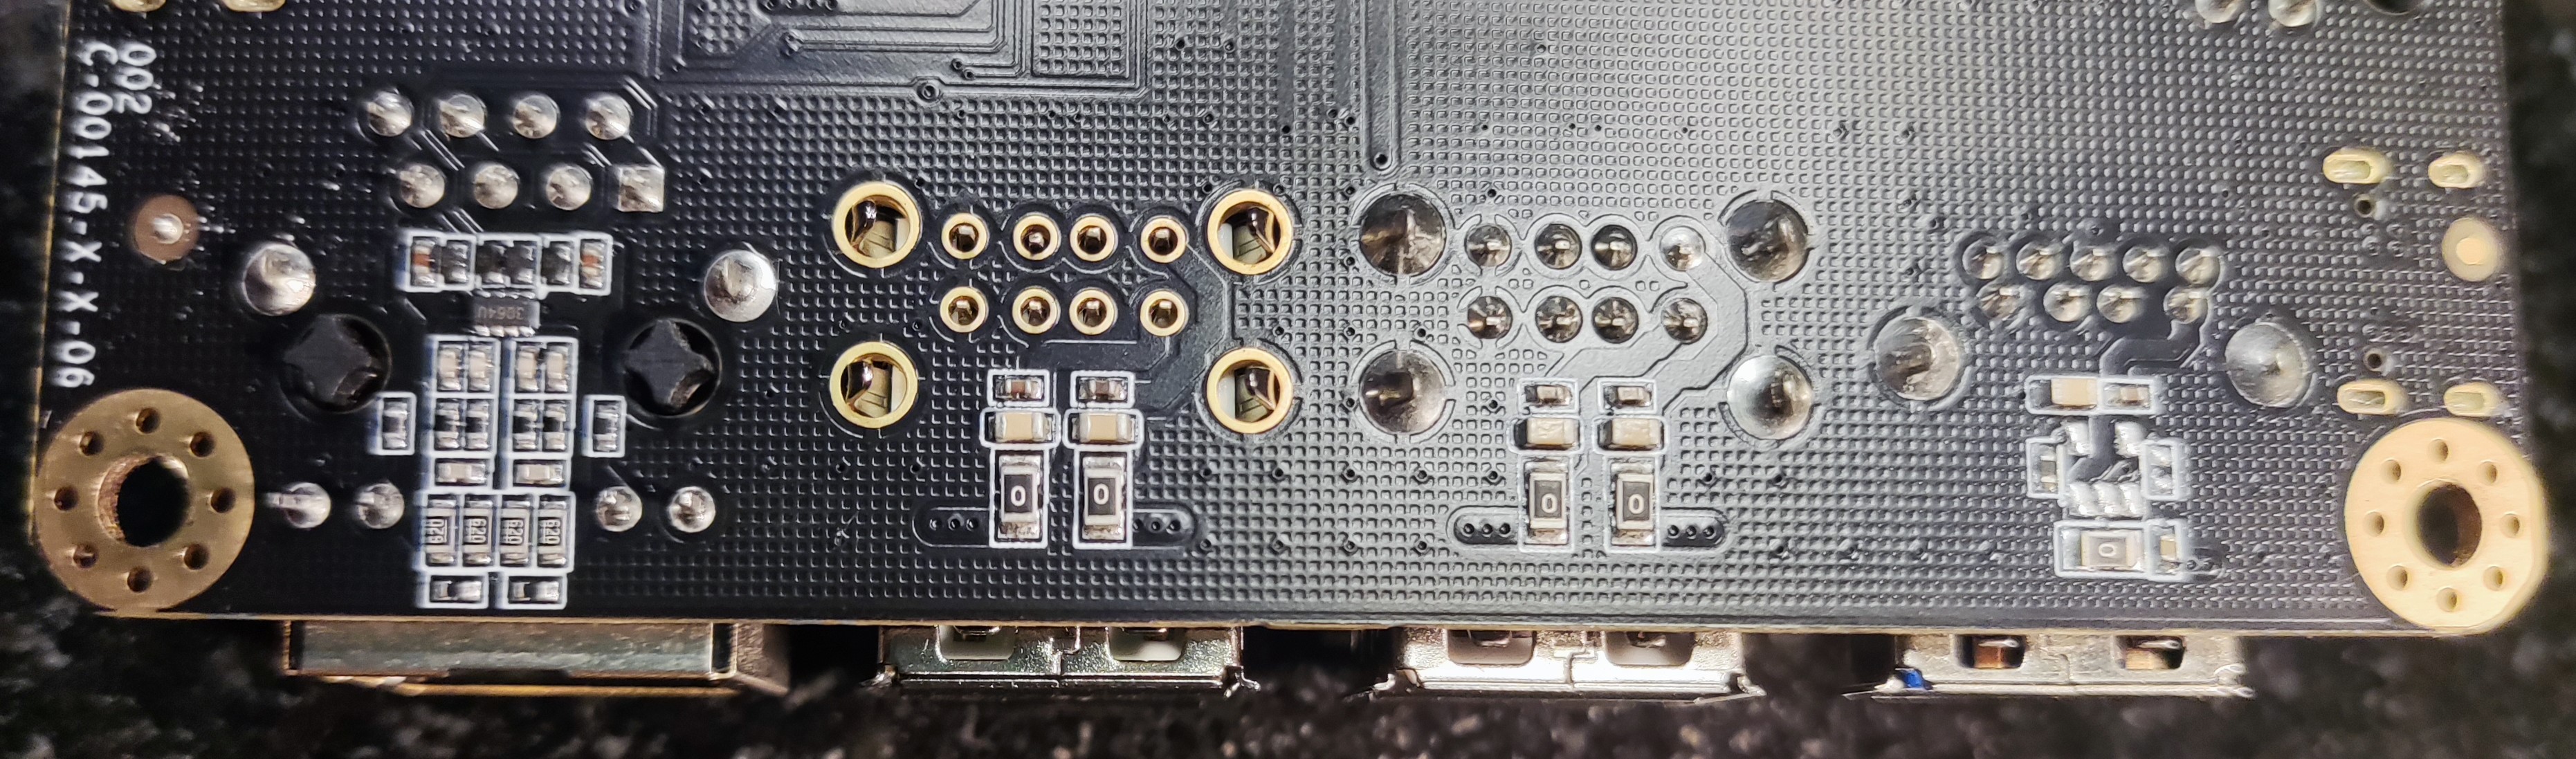
4) Confirm there is a free place for an extra dual USB socket (see the orange arrow on the above picture) and that the surrounding SMD components (small resistors, etc.) have been soldered on the board from the factory.
5) Put the back plate back on its place , if you plan to use the printer in the meantime.
If point 4) was positive, then continue here below, otherwise , sorry for you, you will need to buy a powered USB hub.
6) Order the extra dual USB socket and wait until it arrives.
7) Power OFF, wait a while for the supercap, then remove the back plate of your printer. Be careful with the attached cable from the fan.
8) Confirm you still have all the pictures of your motherboard,
9) Discharge to the ground any static electricity charge you may wear, then carefully remove all the cables form the motherboard. Remove the screws of the board and remove the board.
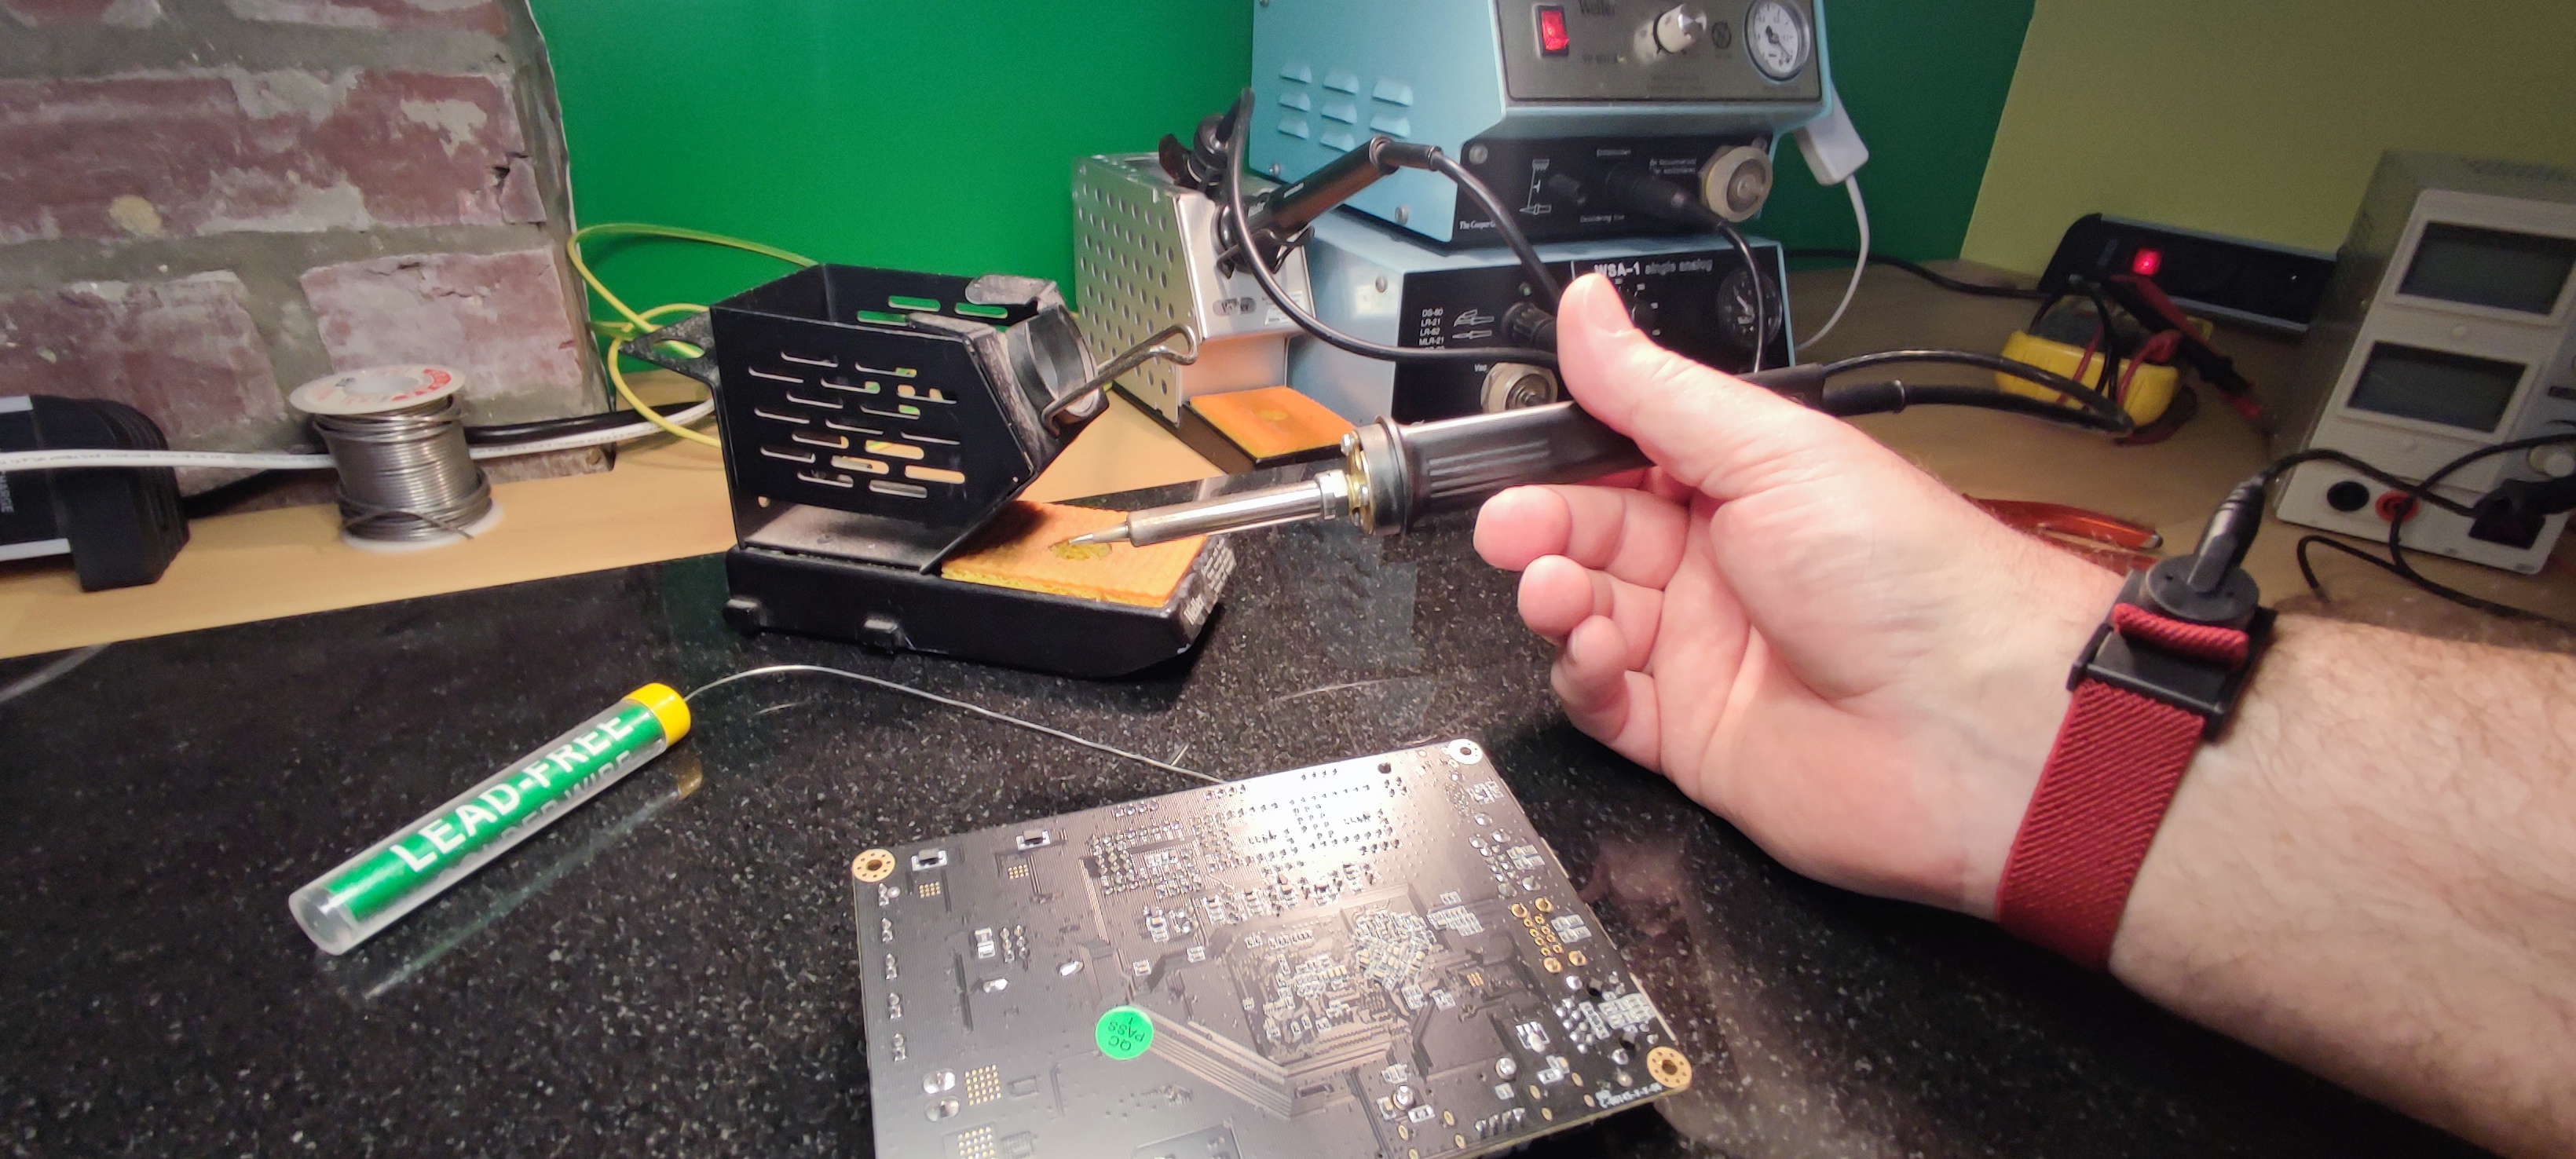
10) Bring the motherboard to your electronic lab place, while NOT building any static charges - Stay grounded ...
11) Solder the extra USB socket, using a correctly grounded soldering iron. Do not go above 400-425°C, using a fine tip and a 0.5mm or 0.8mm solder core wire. Be careful not to melt the plastic of the USB socket --> keep soldering time short.
12) Clean the board where you left burned flux, with some contact cleaner or isopropyl alcool. Check solders are nice and clean.
13) Bring the board back to the printer, while NOT building any static charges - Stay grounded ...
14) Install the board back in place, add the screws.
15) Put all cables back in the right place, double checking with pictures from point 3). Pay extra attention to the thicker black and red cables for the bed heater, those attached with screws.
16) Power ON and test the printer.
17) Add some USB device(s) to the new USB ports, check that they are correctly recognized by the printer.
18) Put the back plate back on its place.
I suppose the same kind of modification could also be possible on other printers using the same motherboard ... I'm thinking about the X-Plus 3 , but I have no way to test that theory.
I hope it helped.
No Comments